
Jira
Package: PROJECTS
1. General
Jira Software is a project management and tracking tool from Atlassian that is primarily used in software development teams. It is used to plan, track and control tasks, errors (bugs), requirements and entire development processes.
What defines Jira Software?
- Agile methods: Supports Scrum and Kanban with boards, backlogs, sprints and burndown charts.
- Issue tracking: Each task (“Issue") can be described in detail, prioritised, commented on and assigned to a responsible person.
- Workflows: Teams can model their own workflows, e.g. “To Do → In Progress → Review → Done“.
- Integrations: Integrates well with development and collaboration tools (GitHub, Bitbucket, Confluence, etc.).
- Reports & dashboards: Provides evaluations of team performance, sprint progress, lead times, etc.
What is it used for?
- Software development (backlog and sprint management)
- Bug tracking
- IT and support processes
- Project and task management in technical teams
Atlassian is an Australian software company that offers popular tools for team collaboration, project management and software development, such as Jira (for agile project tracking), Confluence (for knowledge management/wikis), Jira Service Management (for IT service management) and, more recently, Loom (for video messages), as well as integrated AI features with Atlassian Intelligence. The platforms are used worldwide from small start-ups to Fortune 500 companies to increase efficiency and transparency in work.
Main products and features:
- Jira: The best-known tool for task, process and project management, especially popular with agile development teams.
- Confluence: A central workspace to collect, organise and share knowledge across teams, similar to a wiki.
- Jira Service Management: Enables collaboration between development (Dev) and operations teams (Ops) and offers AI-supported agents.
- Loom: Enables asynchronous video communication to reduce meetings.
- Atlassian Intelligence: Uses artificial intelligence to summarise reports and boost productivity across the Atlassian products.
A prerequisite for using the Jira integration is an active account with Atlassian.
The Jira integration makes it possible to create a Jira ticket directly in the Tickets and Projects modules.
The advantages of directly creating a Jira ticket within the brainX modules are:
- no need to open/log in to Jira
- the Jira ticket is directly referenced in records in brainX
2. Activation and configuration
2.1. Global settings
After opening the “Jira" settings item in the company information, only one block is available for the basic settings (authentication):
- Jira configuration → details on the endpoint
The Jira integration is configured per organization. Companies with several organizations can thus connect each organization to its own Jira project.
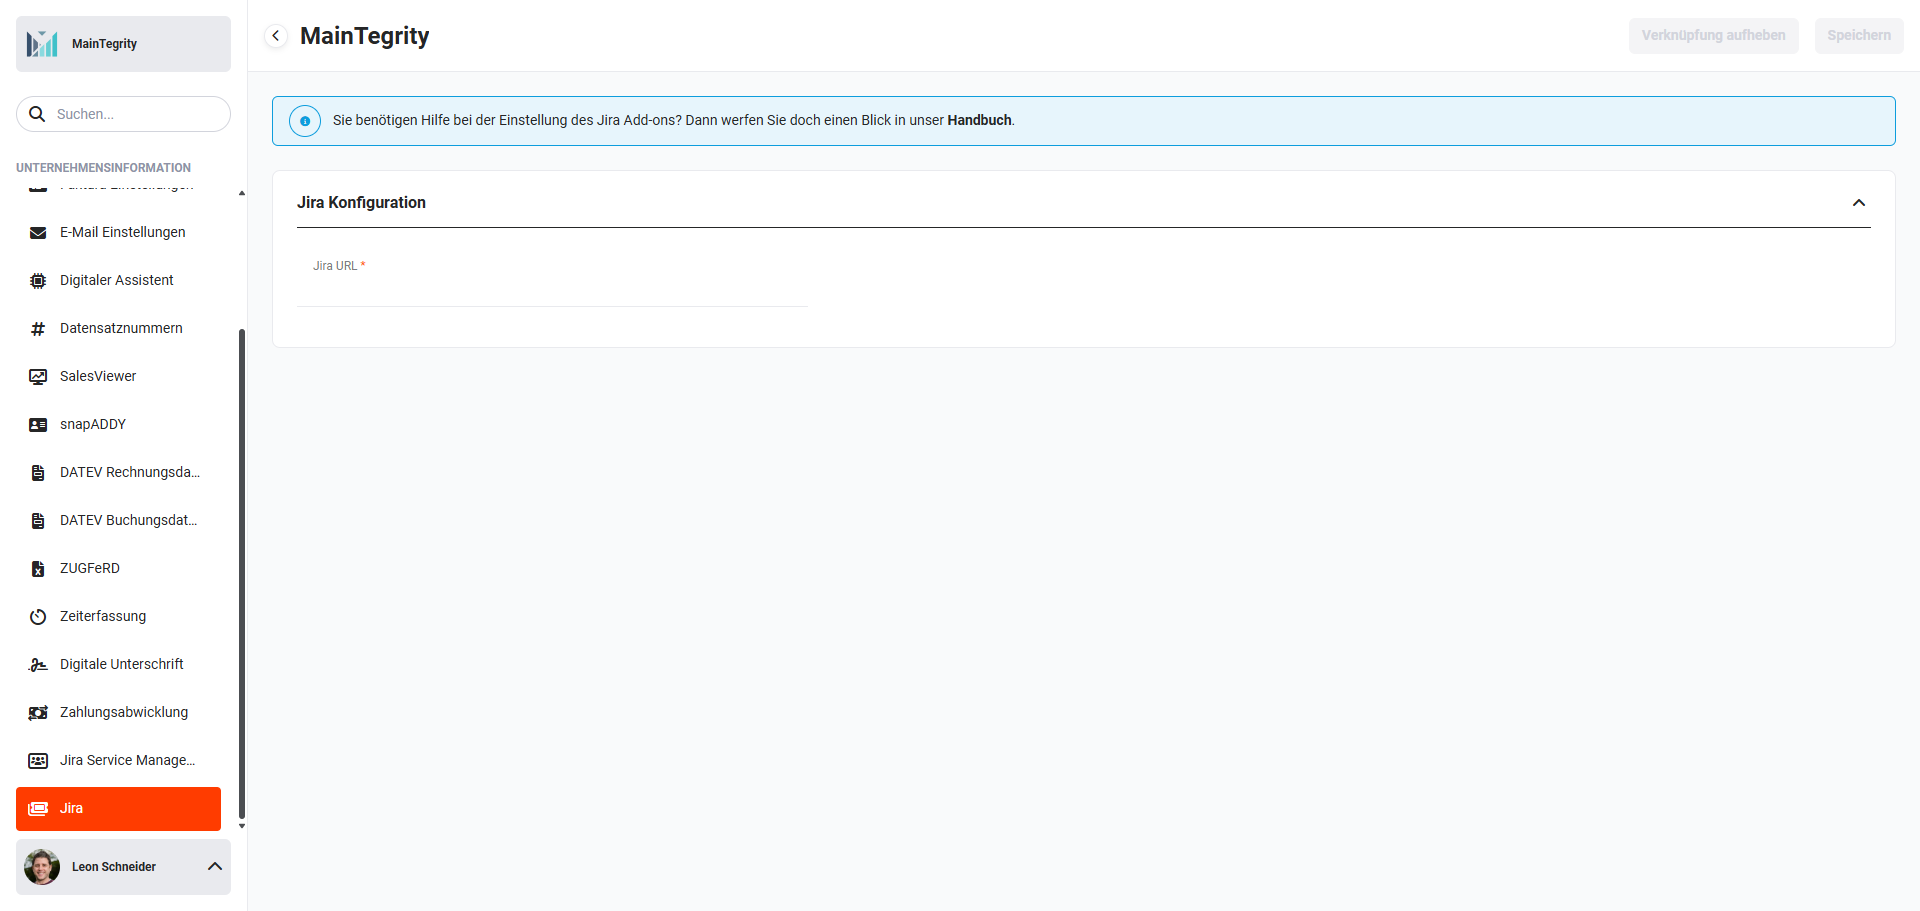 Company information - Jira
The following field is available in the “Jira configuration" block:
- Jira URL → specification of the Jira URL (e.g. https://yourcompany.atlassian.net)
After entering the Jira URL, the “Save" button is activated. After clicking the button, a connection to Jira is established, data is retrieved and the following fields are additionally displayed:
- Jira security key → display of the Jira security key
- Jira webhook URL → display of the Jira Webhook URL
Both fields are filled in automatically as soon as the endpoint has been saved (“Jira configuration" block).
The “Jira security key" and the “Jira webhook URL" are required in Jira itself for the access authorisation of the webhooks. The values can be copied to the clipboard using the “Copy“ icons and inserted into the Jira settings.
The CRM system merely provides the technical interface to Jira. A detailed description of the configuration of the Jira settings is not part of this manual and is the responsibility of the Jira administrator.
The following step-by-step overview can serve as guidance:
- Create a new webhook in the Jira project settings under “Webhooks" (requires admin rights).
- Assign a name (e.g. “brainX"), enter the webhook URL generated in brainX.
- Enter the security key from brainX.
- Select events: Issue created / updated / deleted as well as Worklog created / updated / deleted.
- Optional: restrict the webhook to a specific project using a JQL filter.
- Save the webhook.
After completing the Jira configuration, additional blocks/fields are displayed in the detail view of a record in the Tickets and Projects modules:
- Block “Jira Integration" → list view with field values from Jira, see section Block “Jira Integration"
- Field “Total Jira time" → display of the time logged in Jira for the Jira ticket, see section Field “Total Jira time"
2.2. User settings
In My Settings - Integrations tab users can authenticate with Jira and store a private API token.
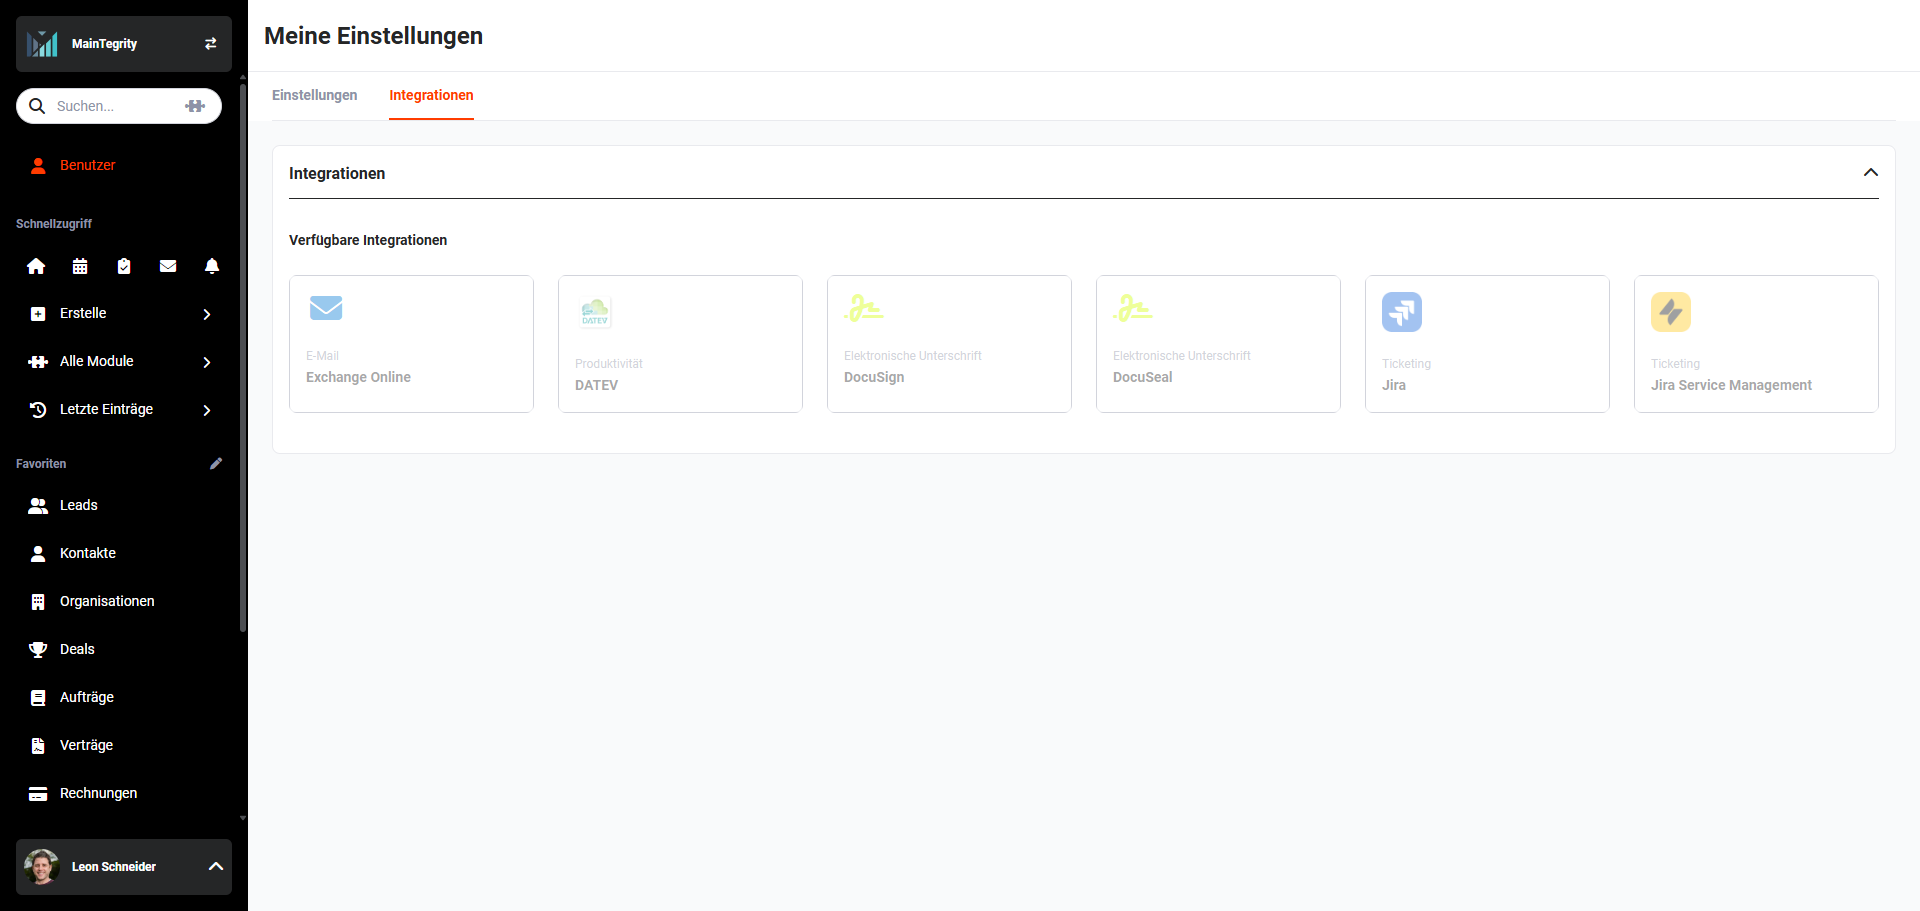 My Settings - Integrations tab
After clicking the “Jira" tile in the “Available integrations" area, the “Jira authentication" popup is displayed:
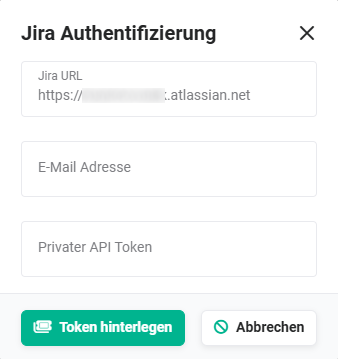 Jira authentication popup
The following fields are available in the “Jira authentication" popup:
- Jira URL → specification of the Jira URL (e.g. https://yourcompany.atlassian.net)
- Email address → email address of the Jira user
- Private API token → API token of the user (can be generated in the user's Atlassian account under the “Security" settings item)
After clicking the “Store token" button, the authentication is carried out and the user can use the integration.
API tokens have an expiry date. After expiry, no connection to Jira is possible any longer. The expired token must be deleted in the Atlassian account and a new token created and stored in brainX.
3. Usage
3.1. Block “Jira Integration"
After completing the Jira configuration in Company information - Jira, the “Jira Integration" block is displayed in the detail view of a record in the Tickets, Projects and Tasks (relating to projects) modules.
After clicking the “Create Jira ticket" button in the “Jira Integration" block, a ticket is created in Jira. The Jira ticket is now displayed in the detail view of the triggering record in the “Jira Integration" block.
For further information, see section Create Jira ticket.
3.2. Field “Total Jira time"
After completing the Jira configuration in Company information - Jira, the “Total Jira time" field is displayed in the detail view of a record in the Tasks (relating to projects) and Projects (in the “Additional information about the project" block) modules.
If the “Original estimate" or “Time tracking" fields are changed in the Jira ticket, the changed values are automatically transferred to the CRM system and displayed in the “Jira Integration" block.
The “Total Jira time" field is also updated and displays the logged time here. If several Jira tickets are linked to a record, the logged time of all Jira tickets is added up and displayed.
In the Projects module, the “Progress (%)" field is additionally updated. The progress is calculated from the “Original estimate" and “Time tracking" fields in the Jira ticket.
Changes in Jira tickets are automatically transmitted to the CRM system via a so-called “push“. This can be used in Automations, for example, to automatically change the status of a project from “in progress“ to “Completed“ as soon as the Jira ticket has reached the status “Done“.
3.3. Create Jira ticket
In the Tickets and Projects modules, a Jira ticket can be created in the detail view of a record in the “Jira Integration" block using the “Create Jira ticket" button.
After clicking the “Create Jira ticket" button, the popup of the same name opens:
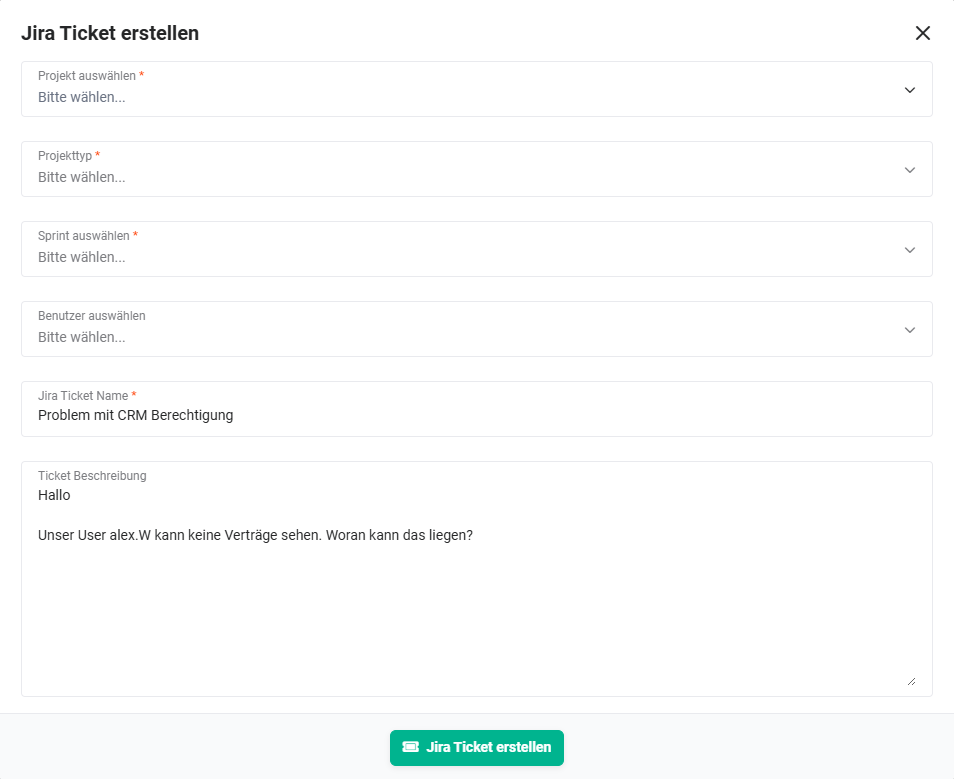 Create Jira ticket popup
The following fields are available in the “Create Jira ticket" popup:
- Select project * → selection of the projects available in Jira
- Project type * → selection of the project types available in Jira (e.g. Epic, Task, etc.)
- Task type → selection of the task type, results from the project type
- Select sprint * → all sprints stored in the project's sprint plan are displayed
- Select user → is entered in the Jira ticket in the "Assignee" field
- Original estimate in hours → specification of the estimated time expenditure (field is only displayed after selecting a project)
- Jira ticket name * → is taken from the title/name of the record (can be overwritten)
- Ticket description → is taken from the “Description" field of the record (can be overwritten)
*Mandatory field
After filling in all fields, the “Create Jira ticket" popup appears as follows:
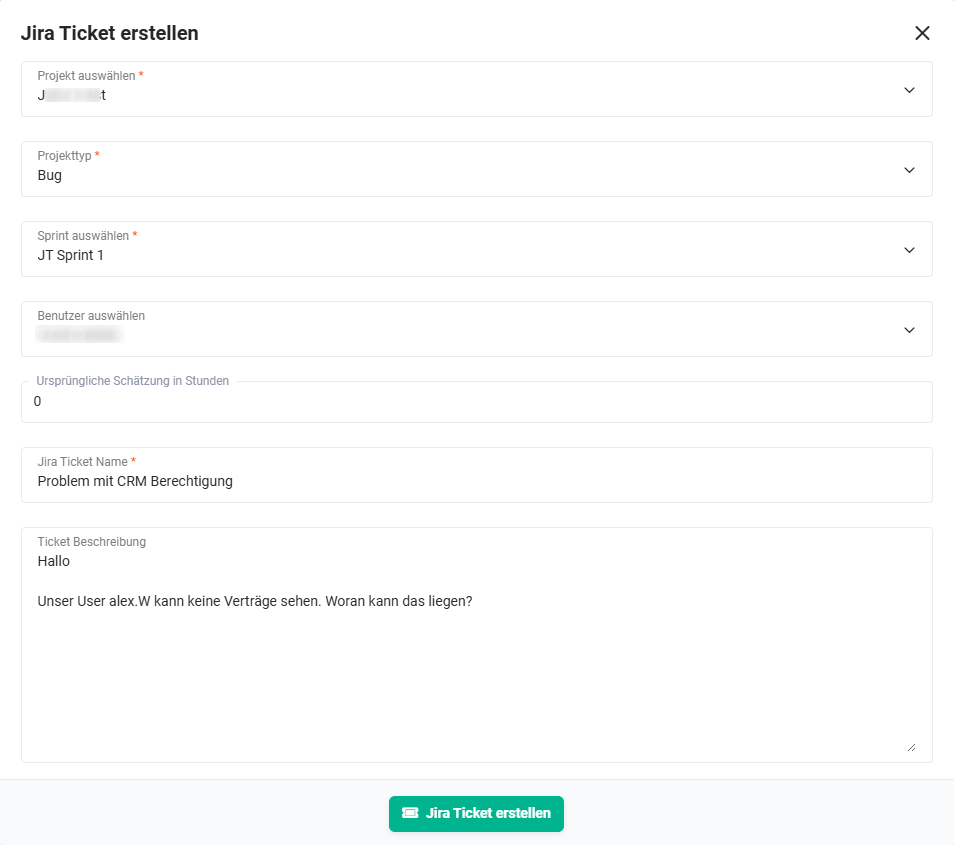 Create Jira ticket popup - fields filled in
After clicking the “Create Jira ticket" button in the popup of the same name, a ticket is created in Jira. The Jira ticket is now displayed in the detail view of the triggering record in the “Jira Integration" block:
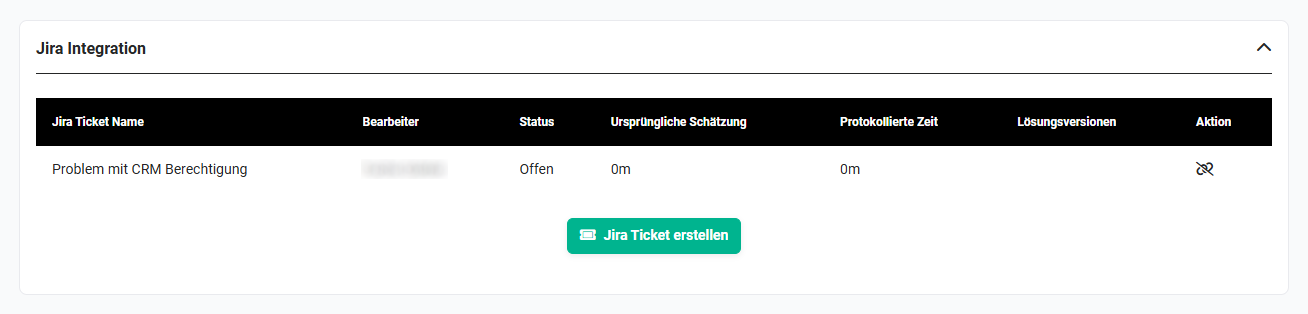
The following columns are available in the “Jira Integration" block:
- Jira ticket name → name of the Jira ticket
- Assignee → Jira username of the assignee
- Status → status of the Jira ticket
- Original estimate → display of the originally estimated time in Jira
- Logged time → display of the logged time in Jira
- Fix versions → display of the Jira fix version
- Action → “Remove link" action
If changes are made in the Jira ticket, they are automatically transmitted to the CRM system and displayed in the “Jira Integration" block.
The page describes a focused integration between brainX and Jira Software — creating tickets directly from within brainX, synchronising time tracking and automatically updating project progress. Both sections make sense. Here they are:
4. Practical examples
1 - Create a bug ticket in Jira directly from a brainX ticket
Initial situation: A customer reports a software error via support. The support employee has recorded the ticket in brainX and would like to create a Jira ticket for the development team directly from it, without having to open Jira separately.
Procedure: In the detail view of the ticket, the Create Jira ticket button is clicked in the Jira Integration block. In the popup, the project, project type, sprint and assignee are selected. The title and description are automatically taken from the brainX record. After confirmation, the Jira ticket is created and directly referenced in the ticket record.
Result: The development team receives the ticket immediately in Jira - without manual duplicate entry. The support employee can see the status of the Jira ticket at any time directly in the brainX record.
2 - Automatically update project progress from Jira in brainX
Initial situation: A project team is working on development tasks in Jira. The project management would like to always see the progress and the logged time in the brainX project record up to date, without manual effort.
Procedure: For the project in brainX, a Jira ticket is created via the Jira Integration block and the original time estimate is stored. As soon as employees log time in Jira or change the status, the values are automatically transferred to brainX via the webhook. The Total Jira time field and the Progress (%) field in the project record are updated automatically.
Result: The project management has an up-to-date overview of hours worked and project progress at all times - directly in brainX, without having to check in Jira.
3 - Automatically set the project status to "Completed" when the Jira ticket is done
Initial situation: As soon as a Jira ticket reaches the status Done, the associated project record in brainX should automatically be set to Completed.
Procedure: In the automations, a trigger with the event Record changed is configured in the Projects module. As a condition, it is checked whether the Jira status is Done. As an action, the project status is set to Completed. The status change in Jira is automatically transmitted to brainX via webhook and triggers the automation.
Result: Projects are automatically set to completed as soon as the development work in Jira is finished - without manual intervention by the project management.
5. Frequently asked questions
Does every user have to authenticate separately with Jira?
Yes, every brainX user who wants to create Jira tickets must store a personal API token in My Settings → Integrations tab. Without their own authentication, it is not possible to create Jira tickets from within brainX.
What happens when a user's API token expires?
After the token expires, no connection to Jira via this user is possible any longer. The token must be deleted in the user's Atlassian account, a new one created and then stored again in brainX under My Settings → Integrations tab.
Are changes in Jira automatically visible in brainX?
Yes, changes to Jira tickets - e.g. status changes, logged times or updated estimates - are automatically transmitted to brainX via the configured webhook and updated in the Jira Integration block of the respective record. The prerequisite is that the webhook is correctly set up in Jira.
Can a brainX record be linked to several Jira tickets?
Yes, several Jira tickets can be assigned to a record. In this case, the Total Jira time field adds up the logged time of all linked Jira tickets and displays it as a total value.
In which modules is the Jira integration available?
The Jira Integration block is available in the detail view in the Tickets, Projects and Tasks (relating to projects) modules. The Total Jira time field is available in the Projects and Tasks (relating to projects) modules.
6. Video-Tutorials
The following videos are available in German only.