
Emails
Package: BASIC
1. General
In the Emails module, all incoming and outgoing emails with customers and colleagues can be logged. This gives team members access to the communication history at any time, making it easier to follow up on conversations and maintain customer relationships.
A sales representative sends a customer a quote by email. The email is automatically linked to the organization record and is visible to the entire team in the Emails module. If the customer replies, the reply is also saved when referenced and assigned to the history. This way, the entire communication is documented seamlessly.
After a customer conversation, a summary is to be sent automatically at 8 a.m. the next morning. The desired time is configured via the Delayed send button. The email is saved as a draft and automatically sent at the defined time.
This section describes only special fields and functionalities of the module, as all general brainX functionalities are described elsewhere in the handbook.
2. List View
The list view in the Emails module offers the usual functionalities of a list view. For more detailed information, see the section Layout/Structure – List View.
In addition to the standard actions, special actions are also available in the list view.
2.1. Actions
Depending on the module, general actions are available in the list view. An overview and description of all general actions can be found in the section Actions (List View).
There are no module-specific actions in this module.
2.2. Special Actions
In the last column of the list view, each row contains the actions icon “Actions” (icon “three dots”).
After clicking it, a flyout menu opens. In addition to the standard actions Edit, Delete and Subscribe, two further email-specific actions are available:
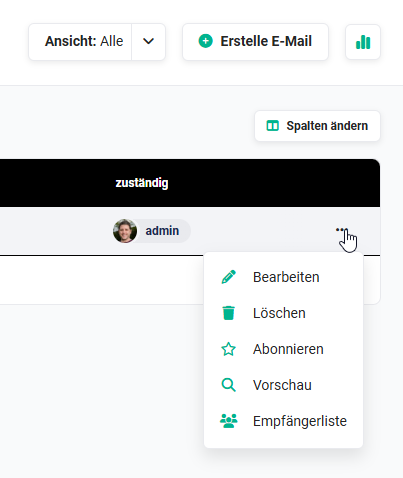 Flyout menu Actions
2.2.1. Preview
After clicking the “Preview” action, a popup opens with a preview of the email.
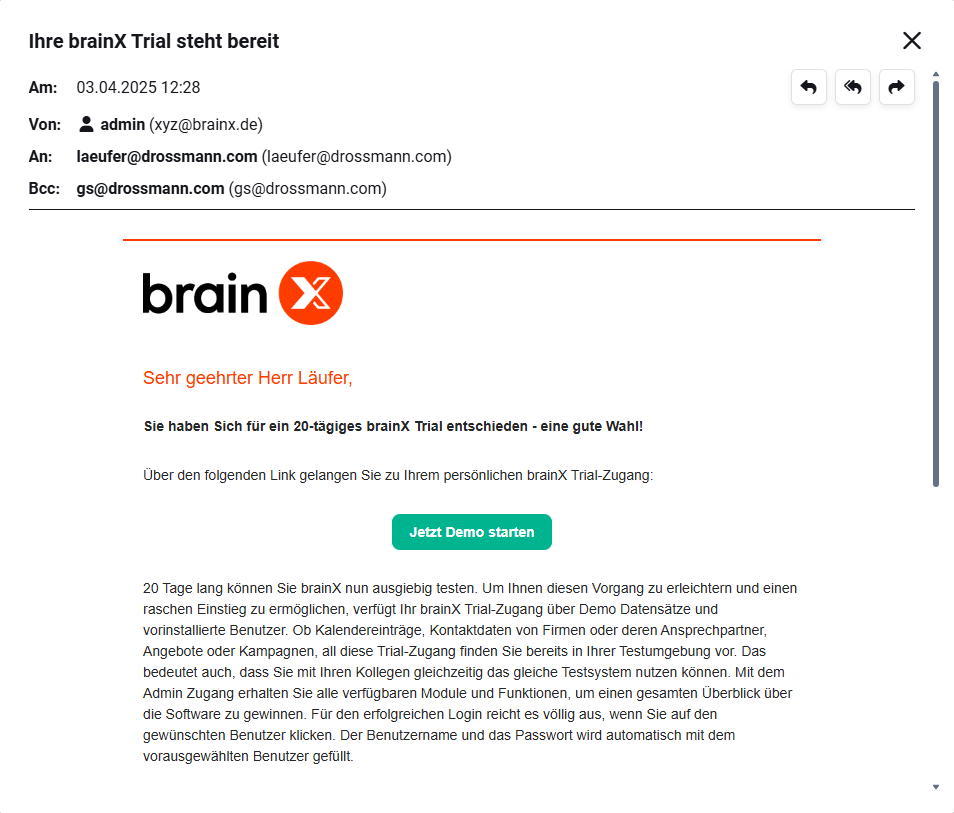 Popup Email preview
The following actions are available in the top right of the popup:
| Action | Functionality |
|---|---|
| Reply | Replies to the sender of the email |
| Reply all | Replies to the sender and all recipients in the To and CC fields |
| Forward | Forwards the message to recipients not listed in the From, To or CC fields |
2.2.2. Recipient list
After clicking the “Recipient list” action, a popup of the same name opens.
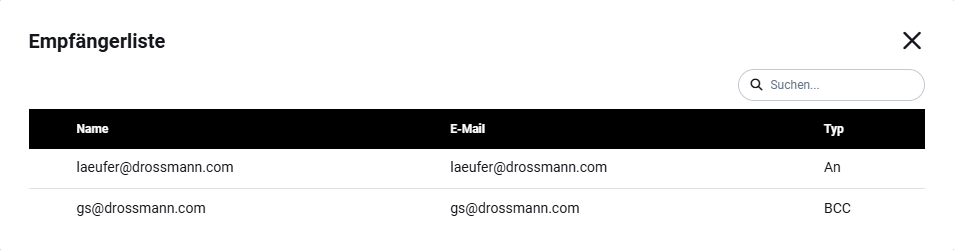 Popup Recipient list
It displays the Name, Email address and Type (To, CC, BCC) of all recipients.
3. Detail View
For the Emails module, no custom layouts can be created in Global Settings - Module management - Layout. However, the layout of the standard view can be edited.
3.1. Fields
The following table describes fields with a non-obvious function. All other fields are self-explanatory.
Block Email Header
| Field | Description |
|---|---|
| Bulk email | Indicates whether the email was sent as a bulk email. With a bulk email, only ONE message is sent to all recipients; recipient-specific placeholders from Email Templates are not replaced – see Section 4.2.3. |
| Status |
|
| Read receipt | Indicates whether a read receipt was requested |
| Delayed send | Indicates whether the email was sent with a delay – see Section 4.2.2. |
| Save email in CRM | Can be deactivated to avoid saving an email in brainX.
Example: When replying to an unreferenced email from the Email accounts module, unwanted saving can be avoided this way. |
3.2. Actions
The following actions are available in the detail view:
3.2.1. General Actions
- PDF export
- Recipient list → Displays the recipient list in a popup – see Action Recipient list
- Recommend
- Delete
- Change tracking
For detailed information on the actions, see the section Actions (Detail View).
3.2.2. Module-specific Actions
| Action | Requirement | Functionality |
|---|---|---|
| Add to history | – | Creates a reference to another email |
| New email | Configured email account | Opens the email editor to create a new email |
| Reply | Configured email account | Replies to the sender of the email |
| Reply all | Configured email account | Replies to the sender and all recipients |
| Forward | Configured email account | Forwards the email to further recipients |
| – | Opens the operating system's print dialog |
4. Creating/Sending an Email
A new email can be created in the following ways:
- Button “Create email” in the list view of the Emails module
- Actions “New email”, “Reply”, “Reply all” or “Forward” in the detail view of an email
- Button “New message” in the Email accounts module
- Action “Create email” in the Navigation bar - Action “Create”
- Clicking an email address in a field of type “Email” in any module
After starting the creation, a popup opens with the email editor.
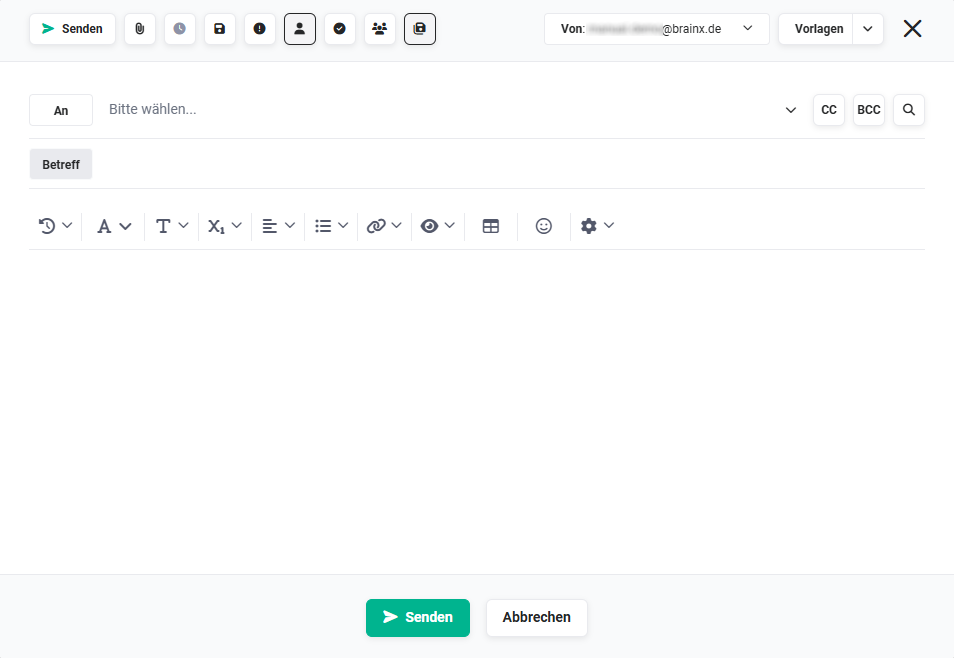 Popup Email creation
4.1. Functions During Creation
The following image shows the email creation popup with the numbered functions described in the table below.
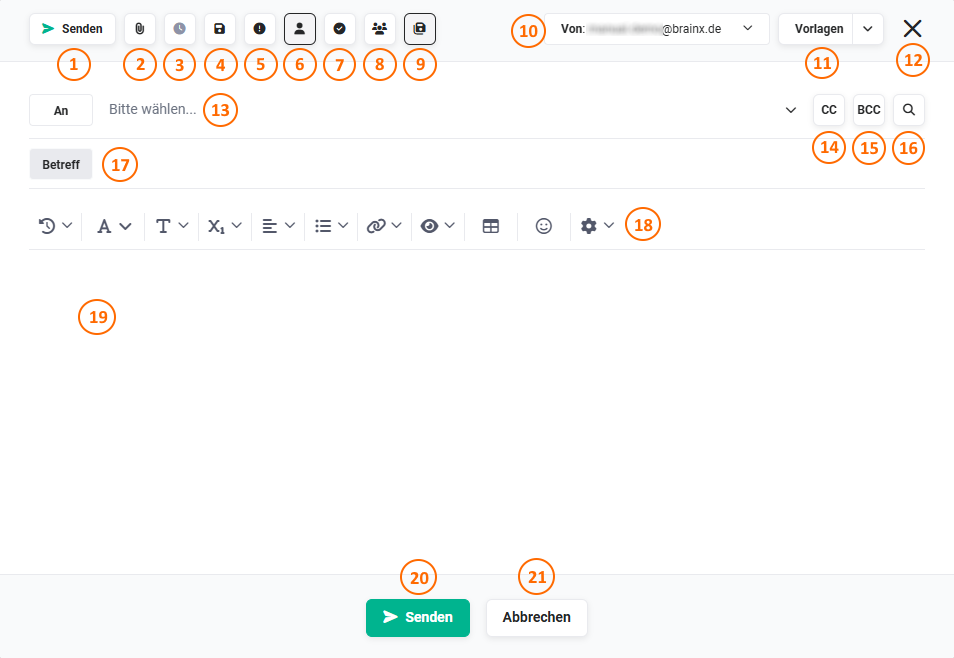 Popup Email creation
The following functions are available in the email creation popup:
| No. | Element | Description |
|---|---|---|
| 1 | Send | Sends the email |
| 2 | Add attachments | Adds attachments to the email – see Section 4.2.1. |
| 3 | Delayed send | Configures delayed sending – see Section 4.2.2. |
| 4 | Save as draft | Saves the email as a draft in brainX |
| 5 | Priority | Marks the email with priority High |
| 6 | Responsible | Selection of the responsible user; default: logged-in user |
| 7 | Read receipt | Requests a read receipt |
| 8 | Bulk email | Marks the email as a bulk email – see Section 4.2.3. |
| 9 | Save email in CRM | Determines whether the email is saved in brainX; default: is saved |
| 10 | Sender account | Selection of the sender account |
| 11 | Email Template | Selection of a signature or template – see Section 4.2.4. |
| 12 | Close popup | Closes the popup; you are asked whether the email should be saved as a draft |
| 13 | Recipient (To) | Entry or selection of the recipient – see Section 4.2.5. |
| 14 | CC | Shows the input line for CC recipients |
| 15 | BCC | Shows the input line for BCC recipients |
| 16 | Search recipients | Opens the “Add recipients” popup to select multiple recipients |
| 17 | Subject | Input line for the subject of the email |
| 18 | Toolbar | Formatting tools for the email body |
| 19 | Email body | Input area for the email content – see Section 4.2.6. |
| 20 | Send | Sends the email |
| 21 | Cancel | Cancels the creation and closes the popup; all entries are lost |
4.2. Notes on Functions
4.2.1. Add attachments
After clicking the “Add attachments” button (icon “paperclip”), a flyout menu opens with the following options:
- Document → opens the Documents popup to select a file from the Documents module
In addition to documents, Wiki file attachments can also be added as an attachment to an email. They are inserted normally like other attachments. - Upload file → opens the operating system's file explorer to select a local file
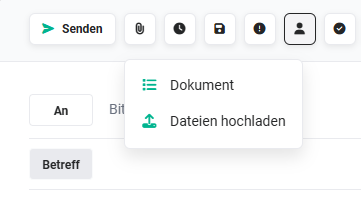 Flyout menu Actions
4.2.2. Configuring delayed sending
For delayed sending, the background task “Delayed send” must be active.
After clicking the “Delayed send” button, a calendar popup opens to configure the date and time of sending.
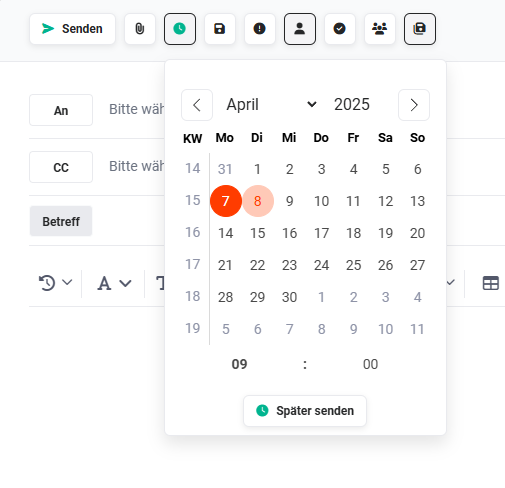 Popup Calendar
The email is saved in brainX and can be recognized in the list view by the status “Delayed send”. Delayed sending can be cancelled by deleting the email draft.
4.2.3. Bulk email
With a bulk email, only ONE message is sent to all recipients. Recipient-specific placeholders from Email Templates are not replaced.
Recipients in the To and CC fields can see the email addresses of all other recipients in these fields – this behaviour corresponds to a normal email client.
If an email is not marked as a bulk email, each recipient receives a separate email. Only this way is a correct replacement of module-specific placeholders from email templates guaranteed. There is no distinction between To, CC and BCC – each of these recipients receives exactly one email, and the addresses from CC and BCC are transferred to the To field of the respective email.
4.2.4. Templates
When creating a new email, templates from the Templates module of type Email Template can be used.
The way it works is described in detail in the section Email Templates.
4.2.5. Entering/Selecting Recipients
In the To input field, you can either enter an email address directly or use a search to select recipients from brainX. After clicking the input line, the search field opens.
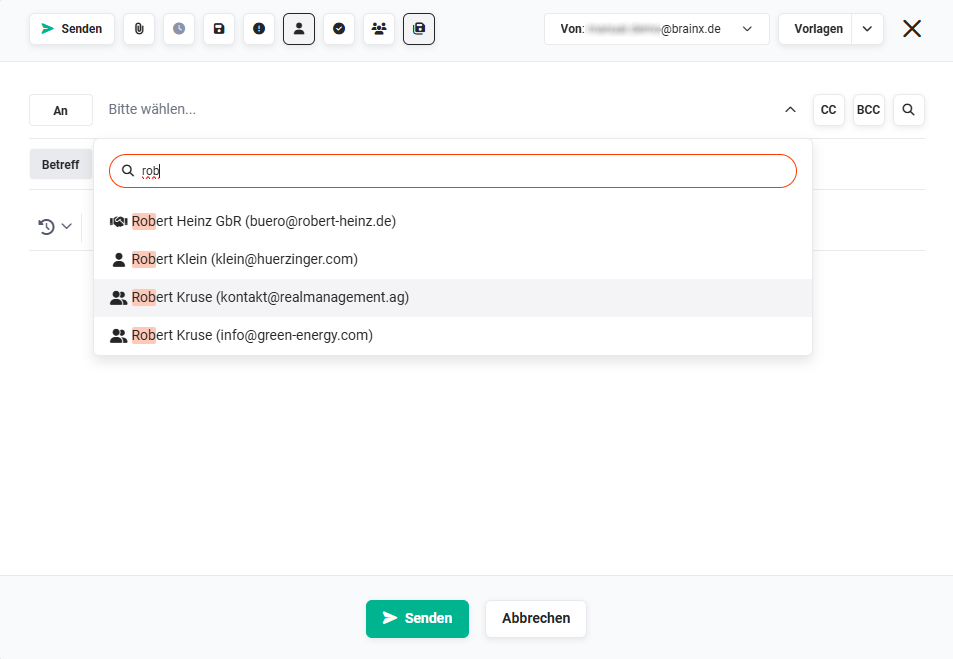 Input field Search
The search starts from the first character entered and displays matches from various modules – recognizable by the preceding module icon. Clicking a match transfers the email address.
4.2.6. Email Body
In the email body, the text can be formatted using the toolbar. It offers functions for text formatting (font, size, bullet points, images, links, tables, etc.).
On mouseover of the “Email body” area, the “Keyboard shortcuts” icon appears in the bottom right.
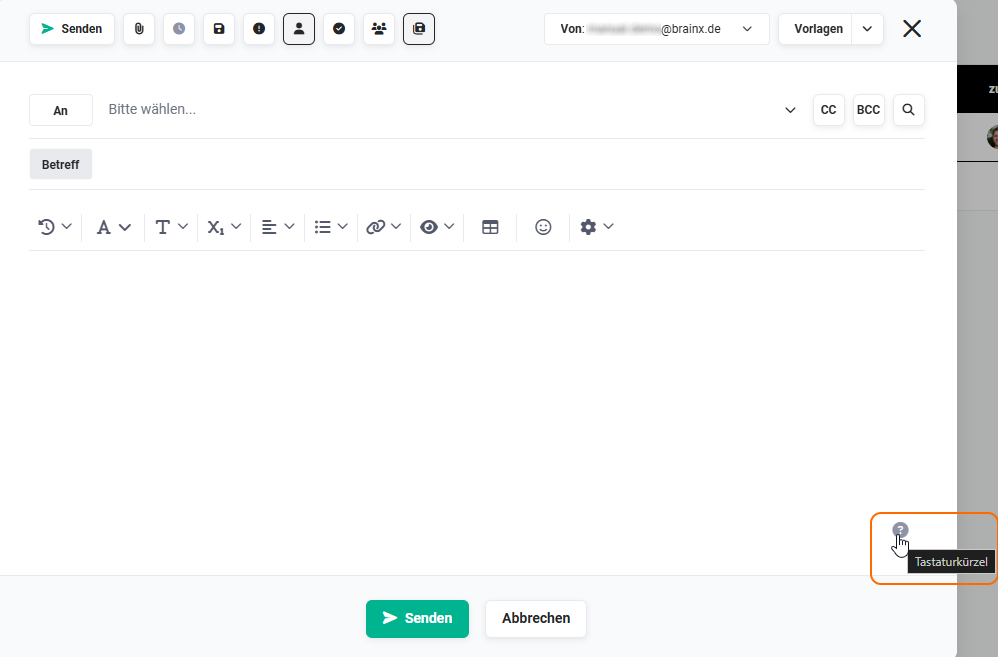 Icon Keyboard shortcuts
After clicking it, the “Keyboard shortcuts” popup opens with all available keyboard shortcuts for block and text formatting as well as history.
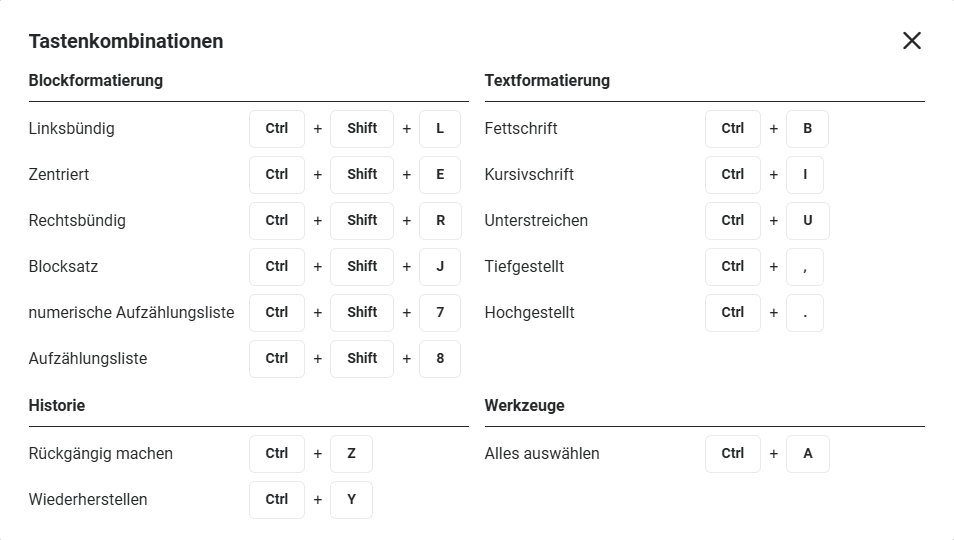 Popup Keyboard shortcuts
5. Editing an Email
Saved emails can be opened in the list view via the “Edit” actions icon or in the detail view via the “Edit” button.
For emails that have already been sent or received, editing is restricted – only fields such as “Responsible” or custom fields can be changed.
Emails with the status “Saved” or “Delayed send” can be edited in full. The available functions correspond to those of email creation – see Section 4.
6. Email Templates
In the email creation popup, the “Templates” button opens a flyout menu with the following options:
- Add signature → inserts the signature stored in the Email accounts module into the creation view
- Load template → opens the “Load template” popup to select an Email Template
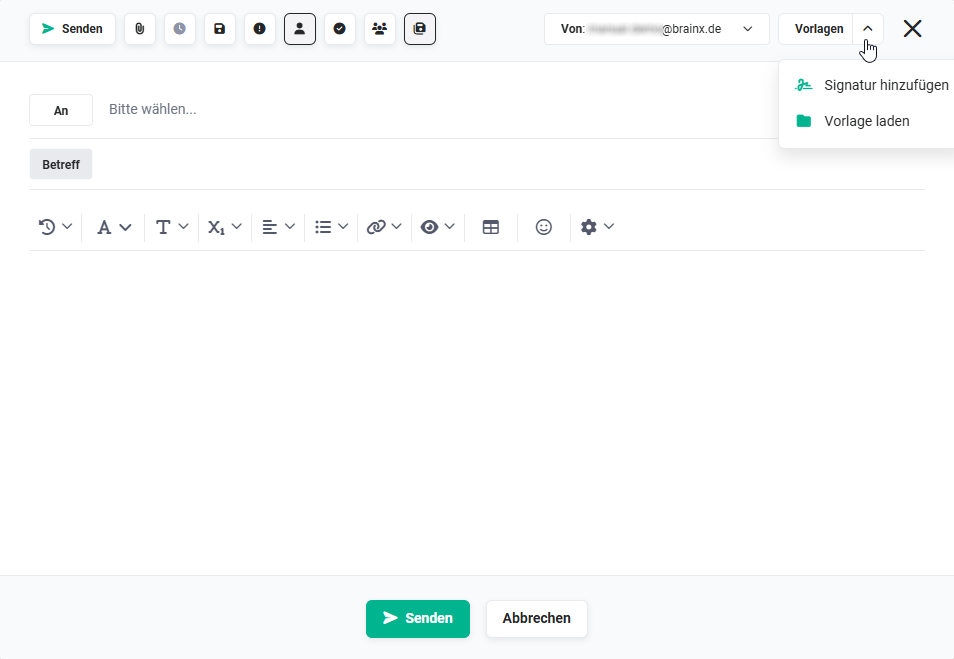 Flyout menu Actions
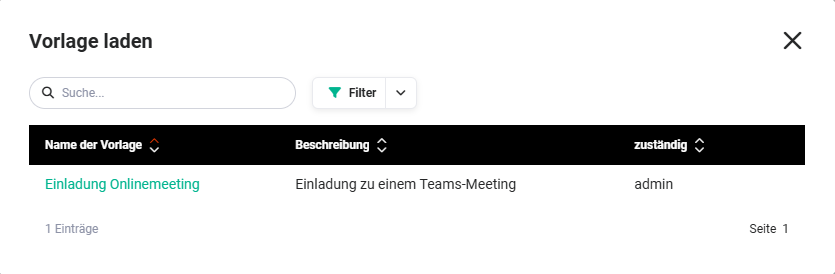 Popup Load template
After selecting a template, its content is transferred to the creation view.
7. Referencing Emails
A sent email is automatically referenced to every record that was added via the recipient selection popup. Further references can be established afterwards via the Relations tab in the detail view.
The following modules are available for references:
- Leads
- Contacts
- Organizations
- Partner
- Deals
- Sales Orders
- Invoices
- Cancellations
- Tickets
- Projects
- Licenses
- Incoming Invoices
- Purchase Orders
- Documents
- Campaigns
- Vendors
- Wiki
- Appointments
- Tasks
- Products
- Delivery Notes
- Timesheets
- Website Visits
- Contingents
If emails are imported into brainX or sent from brainX and thereby linked to contacts, they are automatically also linked to the respective main organization of these contacts.
A reference between two emails is either created automatically (when replying or forwarding), via the Relations tab or via the action “Add to history” in the detail view.
Replying to or forwarding an email from the Email accounts module does not result in an automatic reference to the original message in the email account.
8. Global Settings
The global settings are almost identical to those of other standard modules. The only exception is the Layout editor in Global Settings – Module management:
- No custom layouts can be created for the Emails module.
- The layout of the standard view can generally be edited, however, for some blocks it is not possible to create or move fields. Some blocks cannot be hidden and some fields cannot be edited.
All other settings such as record visibility or permissions via Profiles can be configured as usual.
9. Automation with Email Task
As the sender of an email task in an Automation, only email accounts for which the switch “Automation allowed” is active can be selected – see Email accounts.
Emails sent by an automation are located in the “Sent folder” of the sender account and are created as a record. They are referenced to the recipients and the triggering record, provided this record supports references to emails.
If the configured sender account no longer exists at the time of sending, the email is saved as a draft. The administrator automatically receives a notification with a link to the draft.
10. Special Emails/Notifications
Some functions in brainX that send emails deviate from the usual behaviour:
- Email file as attachment -> This action is available in the detail view of the Documents module. The email creation view opens and the document is already preselected as an attachment. The email is automatically linked to the recipients.
- Wiki recommendation -> If an article from the Wiki module is recommended, a bulk email is sent to all recipients. The email is not stored in the system, but can be found in the outbox of the recommending person. A recommendation is only possible if the current user has configured an email account.
- Email notifications -> For subscribed records with email notification enabled, brainX automatically sends a message to all subscribers when the record changes. This email is not stored in the system and not referenced. The same applies to notifications due to newly created comments.
11. Notes on Changing the Email Provider
If the email provider is changed, the following places in brainX must be taken into account:
- Global Settings – Company information – Central mail server → The details of the new mail server must be entered.
- Module Email accounts → Every user with a configured email account must set up the new email account and delete the old one. It may be advisable to run both email accounts in parallel temporarily.
- Automations that send emails → In all affected automations, a new email account with the Automation allowed switch enabled must be set as the sender.
- Automation with email scanner → If the email scanner is used, the new email accounts must be configured, possibly temporarily in parallel with the old ones.
- Changing email addresses → Email addresses must be updated in the following places: My Settings, Email Templates, PDF Templates and Company information.
12. Troubleshooting
Error message: Address in mailbox given [...] does not comply with RFC 2822, 3.6.2.
This message means that the local part of the email address (before the @ sign) contains disallowed characters, e.g. ü, ö, ä or ß.
13. Practical Examples
1 – Documenting a customer's communication history seamlessly
A sales representative conducts multi-part correspondence by email with a potential customer – from the first contact through the quote to the order confirmation. So that the entire history is traceable for the team, every email is linked in brainX to the corresponding contact, organization and deal record.
When sending an email directly from brainX, the recipients are selected from the system via the search function in the To field – the email is thereby automatically referenced to the corresponding records. Incoming replies are opened in the Email accounts module and also referenced via Link with records. Via the Add to history action, replies can be linked afterwards to the original email, so that the complete conversation history is visible in chronological order on the record.
2 – Preparing a follow-up email with delayed sending
After a customer conversation on Friday afternoon, a structured summary of the conversation is to be sent automatically the following Monday at 8 a.m. – without the employee having to take manual action on Monday morning.
The email is created on Friday, a suitable email template is loaded and the content adjusted. Via the Delayed send button, the date and time for automatic sending are configured. The email is saved as a draft with the status Delayed send in brainX and automatically sent at the defined time, as soon as the Delayed send background task is executed. The employee receives a notification after successful sending.
3 – Mass sending with individual placeholders to multiple recipients
After a trade fair, the sales team wants to send a personalized follow-up email to 20 contacts – each recipient should receive their own, individually addressed email, without the other recipients being visible.
An email template with placeholders for First name, Last name and Company is loaded into the email editor via Load template. All 20 contacts are selected via Search recipients in the Add recipients popup. The Bulk email switch remains deactivated, so that each recipient receives a separate, individually filled email and the placeholders are replaced correctly. After sending, all 20 emails are automatically referenced to the respective contact records.
14. Frequently Asked Questions
What is the difference between a bulk email and a normal email with multiple recipients?
With a bulk email, only a single message is sent to all recipients – all recipients in the To and CC fields can see the others' addresses, and placeholders from email templates are not replaced. If the Bulk email option is deactivated, each recipient receives a separate email with individually filled placeholders, and the recipients do not see each other.
Can I link an email to further records afterwards?
Yes. Subsequent references can be established via the Relations tab in the detail view of an email. A reference between two emails can additionally be created via the Add to history action in the detail view.
What happens to an email sent via automation if the sender account no longer exists?
If the configured sender account no longer exists at the time of sending, the email is saved as a draft. The administrator automatically receives a notification with a link to the draft, so that sending can be completed manually.
Can I save an email in brainX without sending it?
Yes. Via the Save as draft button in the email editor, the email is saved in brainX without sending. Drafts can be opened, edited and sent later at any time. Alternatively, the Save email in CRM switch can be deactivated if an email is explicitly not to be saved in brainX.
How can I proceed when changing the email provider?
When changing the provider, several places in brainX must be updated: the central mail server in the Global Settings, the email accounts in the Email accounts module, all automations with email sending as well as, if applicable, email addresses in templates, PDF templates and company information. It is advisable to run the old and new email account in parallel temporarily to ensure a seamless transition.
Why do I receive the error message “does not comply with RFC 2822”?
This error message appears when disallowed characters are used in the local part of an email address – that is, before the @ sign – e.g. umlauts such as ü, ö, ä or the special character ß. The affected email address must be corrected accordingly.