
snapADDY
Package: SALES MARKETING
1. General
snapADDY is a sales-support software for researching and directly transferring B2B contacts into CRM and ERP systems. Among other things, snapADDY features a business card scanner (snapADDY CardScanner App) for smartphones.
The brainX integration “snapADDY” offers the option to transfer business card data scanned via the snapADDY CardScanner App directly into brainX.
To be able to use the snapADDY function, an account with snapADDY is required.
2. Activation and configuration
2.1. Activation
After opening the settings item “snapADDY” in the company information, it appears as follows:
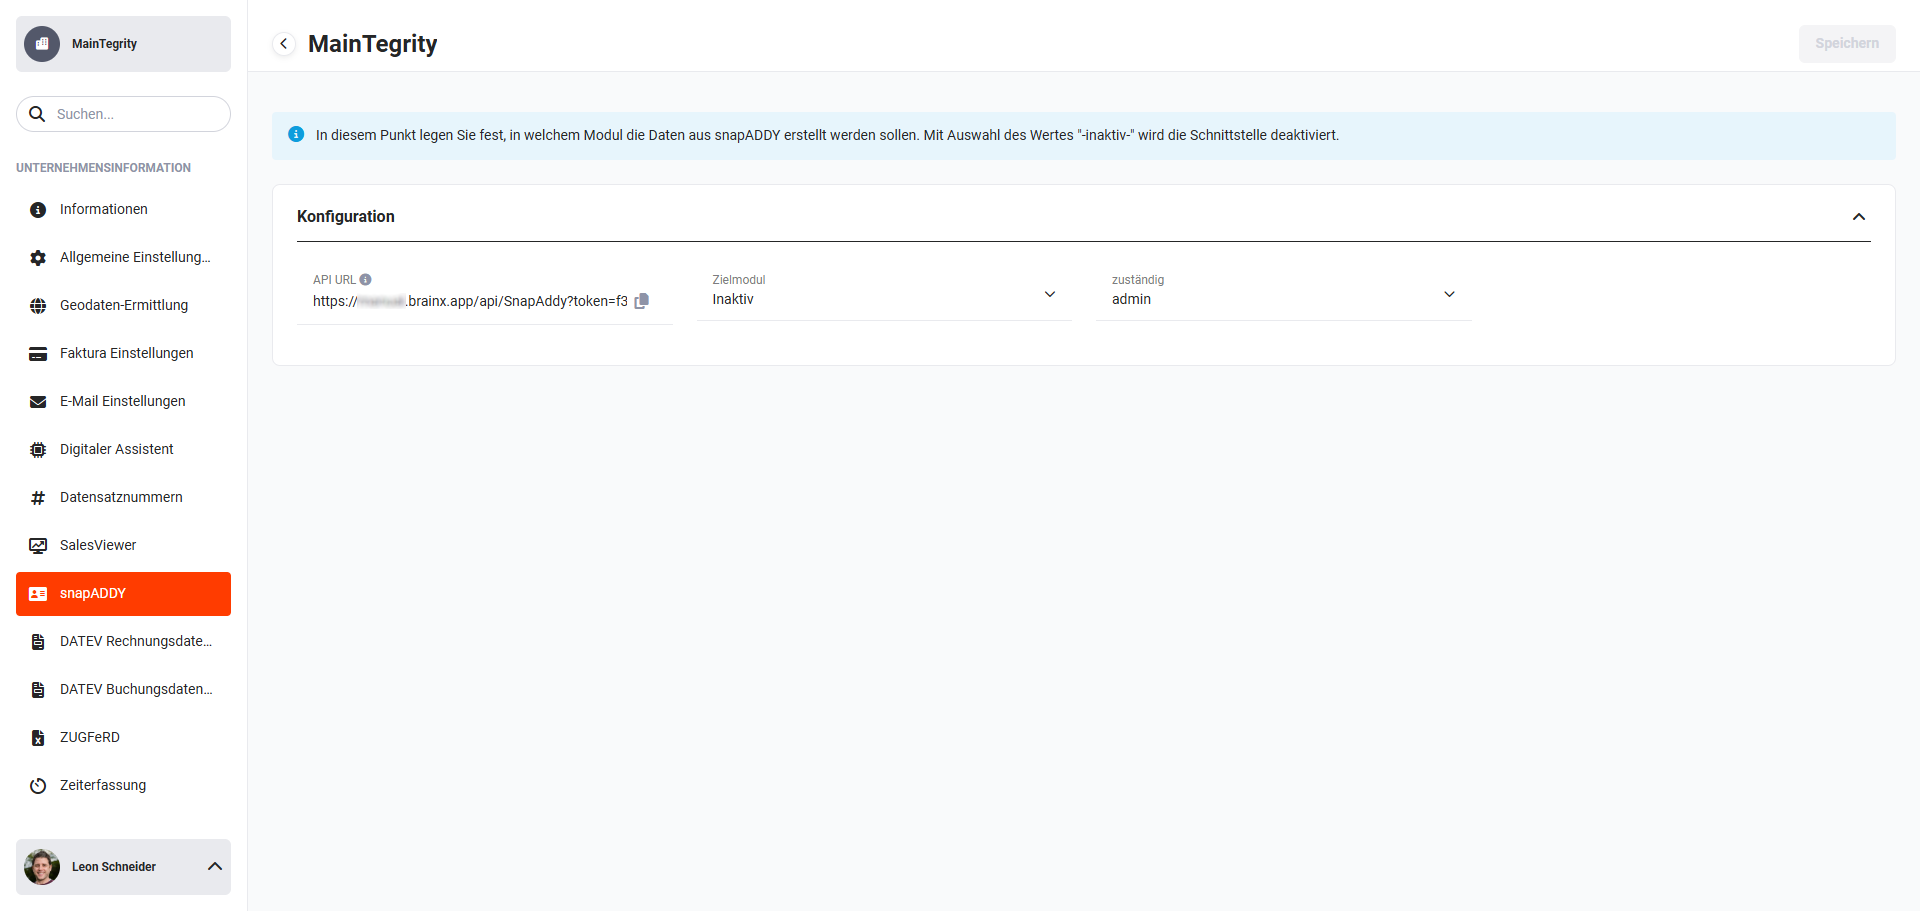 Global settings - Company information - snapADDY
A value is already stored by the system in the “API URL” field. Activation of the snapADDY integration is ultimately achieved through the configuration in snapADDY and the configuration in brainX.
2.2. Configuration in snapADDY
After logging in on the snapADDY website, the settings item “Settings & CRM Verbindung“ must be opened.
On the page now displayed, navigate to the “Integrationseinstellungen“ section. Under “Sonstige Integrationen“, now select “API Einstellungen“.
In brainX, the displayed API URL is now copied in the “API URL” field (select and copy, or by means of the “Copy” icon (“Sheets” icon). Copying places it on the clipboard.
The snapAddy API URL copied in brainX is now entered in the “URL“ field on the snapADDY website.
In the next step, the following items still need to be configured in snapADDY:
- For “HTTP method” the option “POST“ must be selected!
- The button “Set as default CRM“ must be clicked!
To complete the configuration in snapADDY, the changes simply need to be saved.
2.3. Configuration in brainX
Before the configuration in brainX is carried out, the configuration in snapADDY must have been completed.
After opening the settings item “snapADDY” in the company information, three fields are displayed in the “Configuration” block:
- API URL → Display of the snapAddy API URL
- Target module → picklist of the target module
- responsible → user or group that is to be responsible for the generated record
2.3.1. Selecting the target module
In the first step, the target module is selected. In this item, you define into which module the data generated from the snapADDY CardScanner App is to be transferred. The modules Leads and Contacts are available as target modules.
After selecting the target module, two further settings areas are shown:
- Field mapping → Configuration of which data (fields) from snapADDY is to be transferred to and stored in which brainX fields
- Additional field details → Selection of a layout to store default values in fields when creating a record
2.3.2. Field mapping
In the “Field mapping” block, you configure which data (fields) from snapADDY is to be transferred to and stored in which brainX fields.
All fields that are defined as mandatory fields in brainX must be selected!
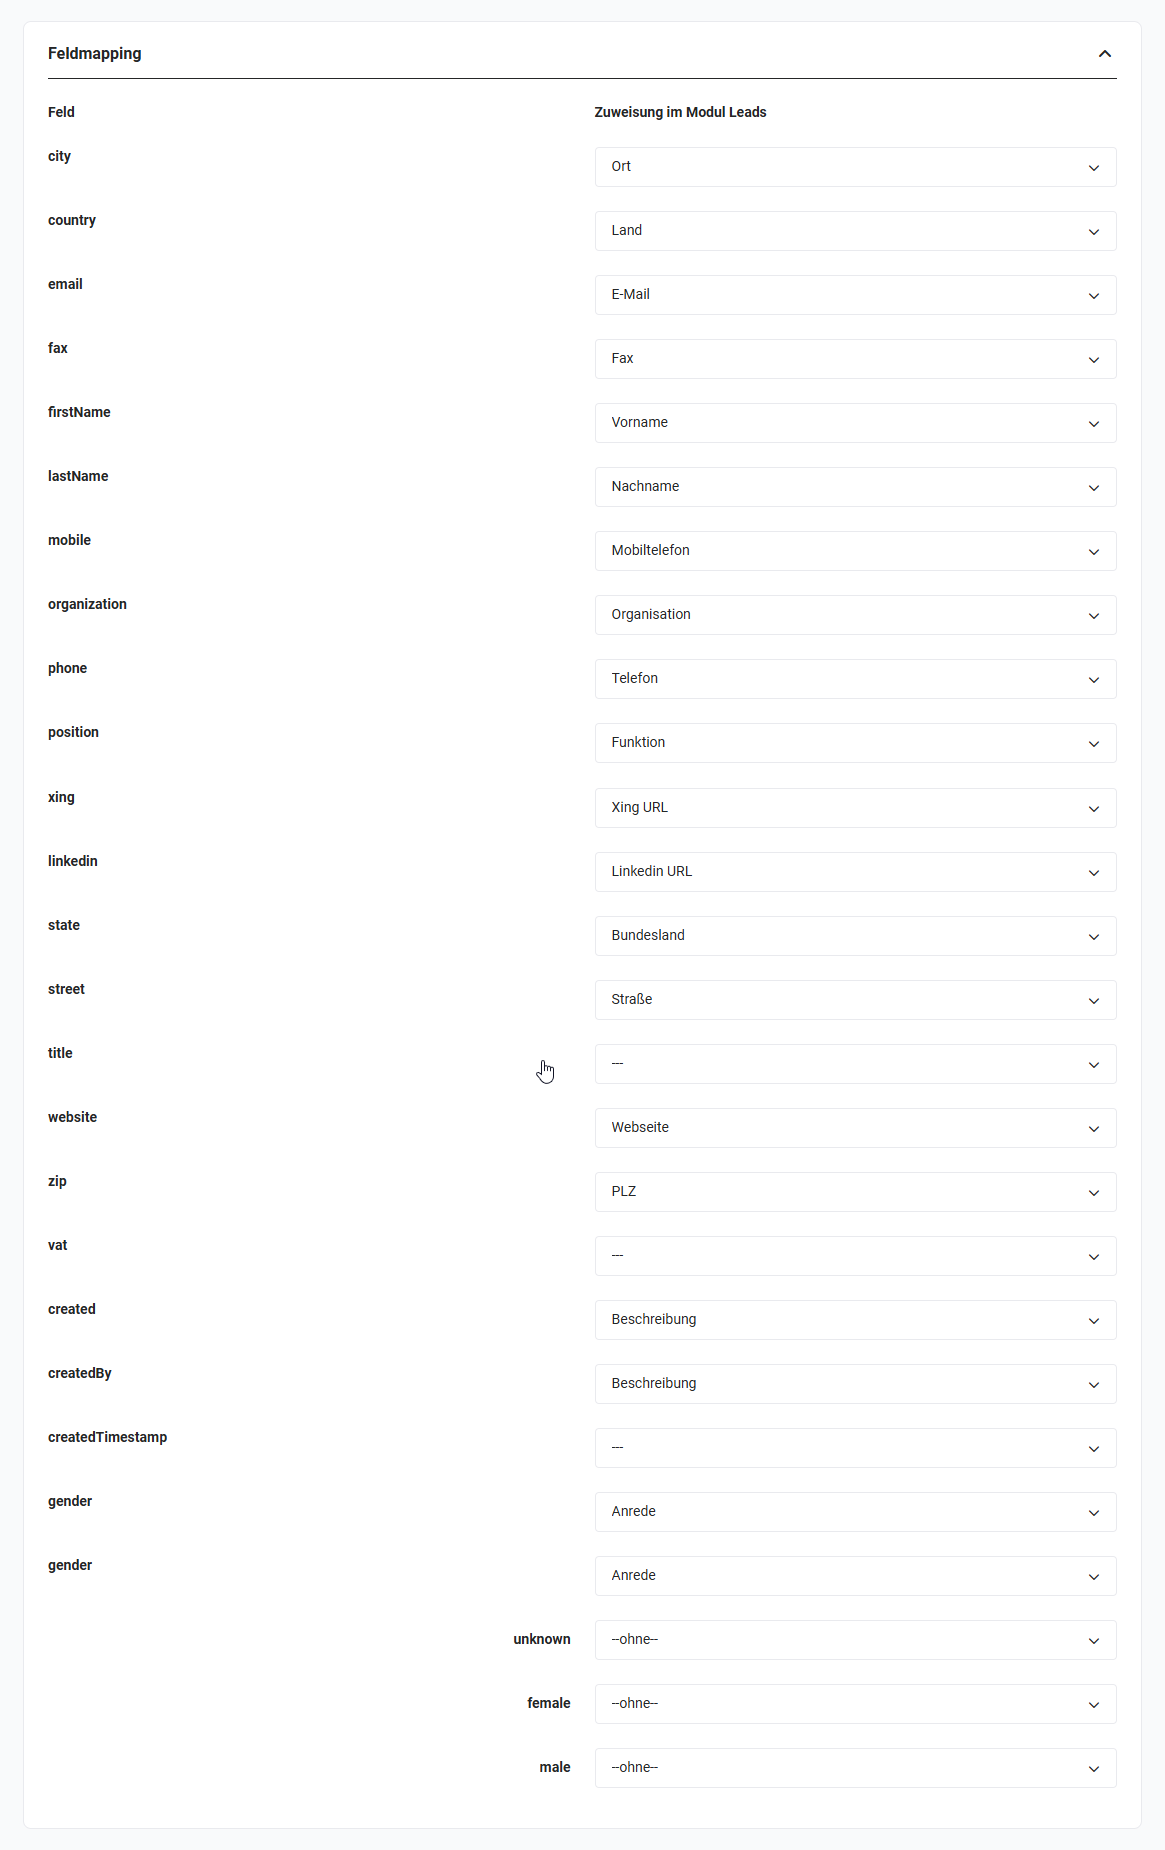 snapADDY Field mapping block for the Leads module
The assignments for the modules Leads and Contacts are already largely pre-selected here, but can be changed if required.
2.3.3. Additional field details
In order to pass along additional static values during creation, or to populate mandatory fields statically, a different layout can be selected for the detail view of the respective module for the creation of new records.
In custom layouts, fields can be assigned default values. If a custom layout (view) that contains default values is selected for the data transfer from snapADDY, these values are stored accordingly.
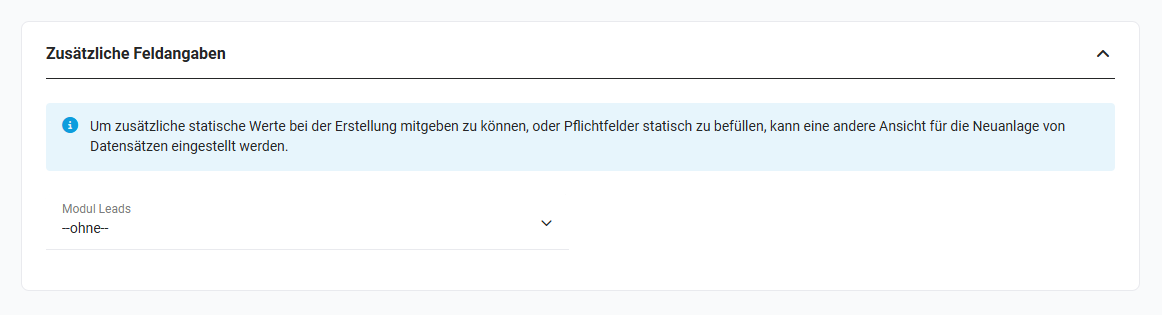 snapADDY Additional field details block
3. Usage
With the free snapADDY CardScanner, every scanned business card can be saved directly on the smartphone. Whether Android or iOS device: a single tap is enough and the new contact is digitised in the phone book.
With a paid upgrade to the snapADDY CardScanner CRM, you have a direct connection to your brainX system.
Scanned data can thus be transferred directly into brainX into the Leads or Contacts modules.
Further information on using the snapADDY app itself is available on the snapADDY website.
4. Practical examples
1 - Transferring a business card directly into the CRM at a trade fair
Initial situation: A sales representative collects numerous business cards at a trade fair and does not want to type them into the CRM manually, but rather capture them directly on site.
Procedure: The business card is photographed with the snapADDY CardScanner App. The recognised contact data is read out automatically and, via the configured interface, created directly as a lead in brainX - including name, company, phone number and email address.
Result: All trade fair contacts are available in brainX immediately after scanning. Manual re-entry is eliminated and leads can be processed further while the fair is still ongoing.
2 - Creating a new business partner from a business card as a contact
Initial situation: After a first meeting with a potential business partner, an employee wants to capture the contact quickly and error-free in brainX.
Procedure: The target module is set to Contacts in the snapADDY configuration. The business card is scanned with the CardScanner App. The data is created directly as a contact record in brainX; the field mapping ensures the correct assignment of all relevant fields.
Result: The new contact is captured completely and correctly in brainX - without typos and without delay.
3 - Automatically populating default values on business card import
Initial situation: All leads imported via snapADDY are to be automatically assigned the lead source Trade fair and a specific responsible user, without this having to be maintained manually.
Procedure: In the module management, a custom layout is created for the Leads module in which the Lead source field is assigned the default value Trade fair. In the snapADDY configuration in brainX, this layout is selected under Additional field details. In addition, the desired user is stored in the responsible field.
Result: Every lead imported via snapADDY is created automatically with the correct lead source and the responsible employee - without subsequent manual adjustment.
5. Frequently asked questions
Which snapADDY account do I need for the brainX integration?
For the direct transfer of business card data into brainX, a paid snapADDY CardScanner CRM account is required. The free CardScanner only saves contacts in the smartphone's phone book; a CRM connection is not included.
Into which modules can business card data be transferred?
Leads and Contacts are available as target modules. The setting is made in the snapADDY configuration in brainX. Only one target module can be active at a time. If the interface is to be temporarily deactivated, the Inactive option is available.
What happens if a mandatory field in brainX is not populated by snapADDY?
Mandatory fields must either be assigned to a snapADDY field in the field mapping or pre-populated with a default value via a custom layout. If a mandatory field is neither populated nor assigned a default value, the record cannot be created correctly. The configuration should therefore be checked carefully before productive use.
Can I adjust the field mapping afterwards?
Yes, the field mapping can be changed at any time in the snapADDY settings in brainX. The pre-selected default assignments for the Leads and Contacts modules can be adjusted as required to reflect individual field assignments.
Must the configuration in snapADDY be carried out before the configuration in brainX?
Yes, the configuration in snapADDY must be carried out first. Only after that can the setup in brainX be completed. The correct order is: (1) configuration in snapADDY, (2) configuration in brainX.