
CSV Import
Package: BASIC
1. General
The file format CSV stands for Comma-separated values and describes the structure of a text file for storing or exchanging simply structured data.
The file name extension is .csv.
CSV files may contain tables or lists of varying length. Within the text file, certain characters have a special function for structuring the data. Depending on the software used and the user settings, these are often the comma, semicolon or colon characters.
The first record can be a header record that defines the column names.
In most cases, Excel files are used as the basis for a CSV import.
The following section Convert source file explains how to convert the source file (.xlsx) into a CSV file (.csv).
In practice, Excel is not the first choice for creating or editing CSV files. Nevertheless, experience shows that Excel is often used, as many users are familiar with it.
Recommended alternatives are “Notepad++” under Windows, and “BBEdit” or “TextMate” under macOS.
For users, “readability” in Excel is generally better, but especially with formatting problems the alternative CSV programs are very helpful.
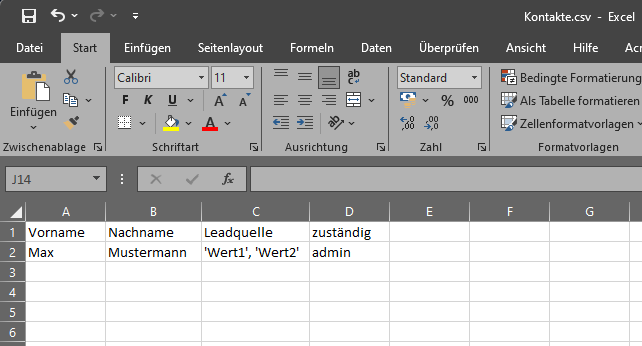 View of the CSV sample file in Excel
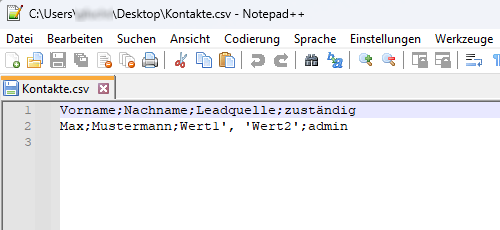 View of the CSV sample file in Notepad++
2. Convert source file
The description assumes that the source file is a Microsoft Excel file (.xlsx), which must first be converted into a format compliant with brainX (.csv).
The content of the source file should meet the following criteria:
- The first row should be the header row, in order to make it easier to assign the columns later during import. Ideally, the columns should be named like the target fields in brainX.
- The source file must contain at least as many columns as there are mandatory fields defined in the target module in brainX. If mandatory fields are missing or empty, the record cannot be imported.
- The field “responsible” is essential for the import. This field is used to assign the records to be imported to a brainX user. It is important that the value in this column must always be the user name and that the spelling must match exactly 1:1.
- Instead of a user, a group can also be used in the “responsible” column. Here too, the spelling must match exactly.
- Columns and values whose target field is a picklist in brainX must match exactly 1:1 the spelling of the existing picklist values.
2.1. Conversion steps
- The file must first be opened in Microsoft Excel.
- In the “File” toolbar, select the “Save as” option.
- In the dialog window that opens, select the file type “CSV (comma delimited) (.csv)*”.
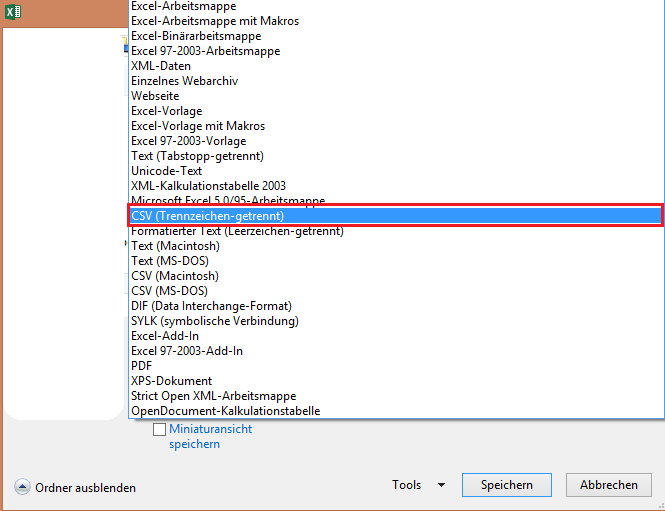 1. Assign a suitable file name and then click Save.
1. Confirm the displayed message with “Yes”.
1. The source file is now available in CSV format and is ready for import.
1. Assign a suitable file name and then click Save.
1. Confirm the displayed message with “Yes”.
1. The source file is now available in CSV format and is ready for import.

This completes the conversion of the Microsoft Excel file into a format compliant with brainX. It is now a text file of type CSV, the separator is a semicolon and the encoding is (as specified by Microsoft) of type ANSI (ISO-8859-1)).
2.2. CSV syntax
In the CSV file, the syntax must be observed, which depends on the field types/values. If values are to be imported into a field of type “picklist” or “multi-picklist”, these values must be enclosed in single quotes.
If several values are to be imported into a multi-picklist, they must be separated by a comma followed by a space.
The example for the CSV import in the Contacts module assumes that the fields First name, Last name, Lead source and responsible are imported and that the picklist values of the Lead source field are internally the following:
Value1
Value2
Header: First name;Last name;Lead source;responsible
Field values: Max;Sample; 'Value1', 'Value2';admin
3. Background task for CSV import
For a CSV import to be executed, the background task “CSV/ICS Import” must be active. This background task checks at regular intervals whether new imports are pending and then executes them.
The minimum execution time that can be set is one minute for every cloud variant.
Only one CSV/ICS import can be registered per user and module. As long as it has not been carried out, no further imports can be registered. In this case, the following note appears:
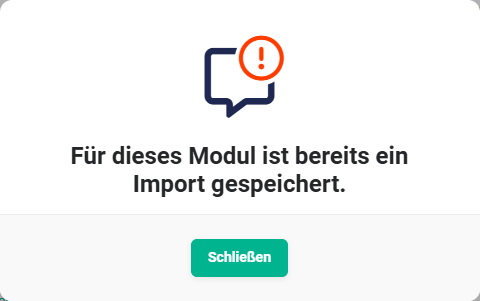
As long as the background task has not executed the registered CSV/ICS import, it can be deleted at any time and another CSV/ICS import can subsequently be registered.
4. Settings for CSV import and limits
On the part of brainX, there is no setting for the maximum value of the number of records to be imported. Nevertheless, certain technical limits are in place here.
The number of records to be imported depends on the following settings:
- Upload limit for record
- Record limit for imports with event handling
By default, this value is set to 100 in brainX systems. This means that if the “Allow events” switch is set to “on” in step 1 of the import, a maximum of 100 records is possible.
If events are enabled, mechanisms such as Automations and change tracking are executed during the import. This can prolong the duration of the import and slow brainX down somewhat depending on the cloud variant.
5. Import CSV file
Whether a user is allowed to carry out a CSV import, i.e. whether the “CSV Import” action is available to the user in the list view, can be configured individually for each module via the profile settings.
For the import, it is important that the user carrying out the action has the necessary rights. With active rights management (e.g. modules are private, functions deactivated), it must be ensured that the target module is active for the user and that the function to import data from CSV files is enabled.
In principle, a user can import records for any users and groups. It should be noted here that, due to the rights settings, some records may not be displayed after the import and are also not taken into account during the manual search for duplicates.
5.1. Import steps
The import steps are described below by way of example for the [Leads]() module.
The CSV import is identical in all modules, with the exception of two special cases:
Clicking the “Actions” button in the list view of the module opens a pop-up menu displaying all actions available for this module.
After clicking the “CSV Import” action, step 1 of 3 steps opens, which are described in detail below.
5.1.1. Step 1 - Select CSV file
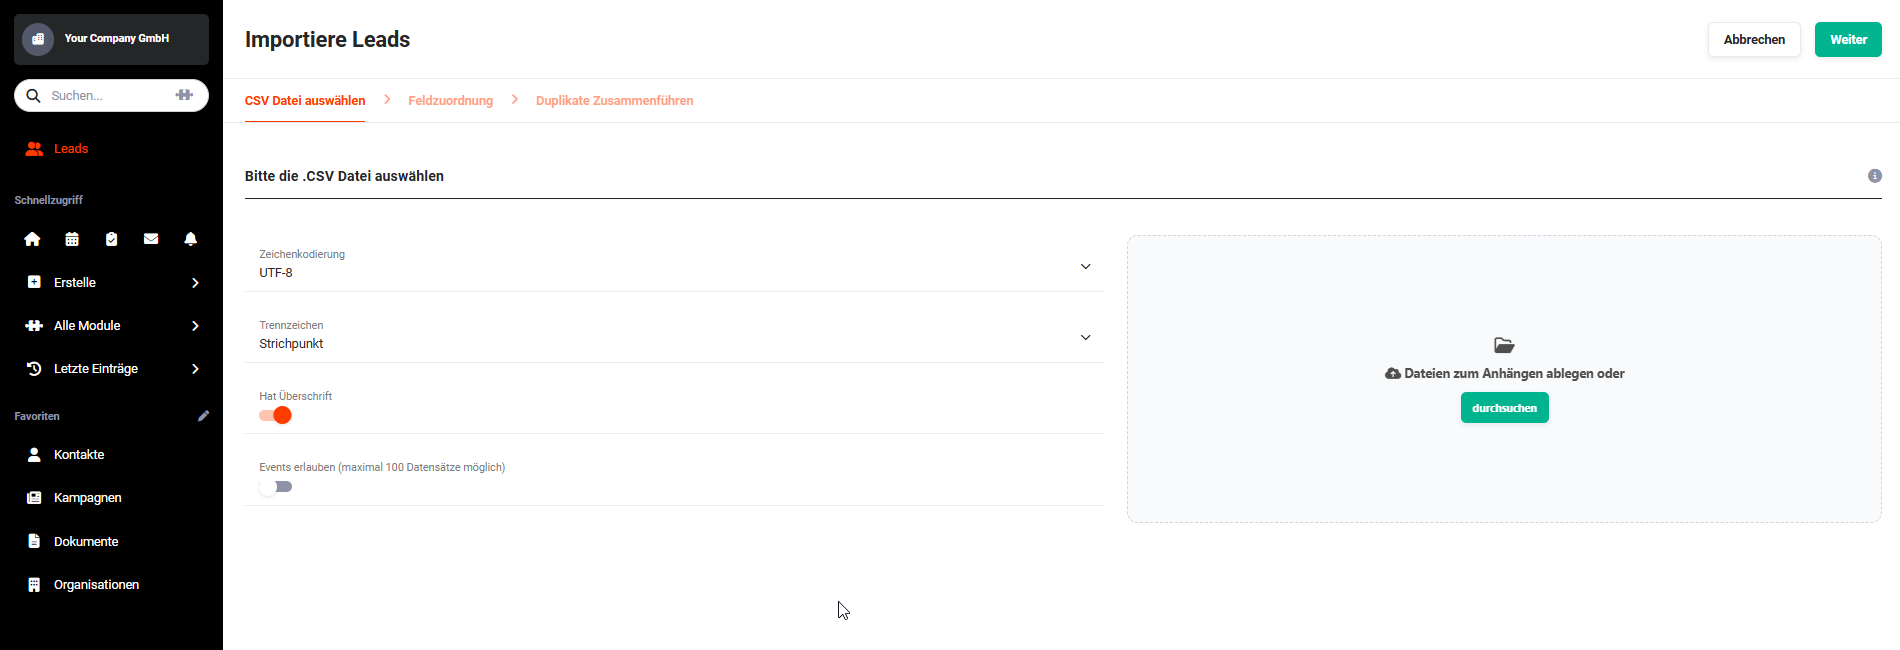 CSV import - Selection of CSV file
In the first step there are the following fields/settings:
- Character encoding → The values UTF-8 and ISO-8859-1 are available for selection here.
For the example, “ISO-8859-1” is selected. - Separator → The values “Semicolon” and “Comma” are available for selection here.
For the example, “Semicolon” is selected. - Has header → Switch to define whether the CSV file contains a header row.
- For the example, “yes” (switch on) is selected.
- Allow events → Switch to define whether events are allowed during the import.
For the example, “no” (switch off) is selected. - File upload → CSV files can be dropped here (drag & drop) or selected via the file explorer of the operating system.
For the example, the file “Leads.csv” is selected.
Now click the “Next” button in the bottom right to proceed to the next step.
If no CSV file has been selected/uploaded, a corresponding note is displayed:
 Note: missing CSV file
If a CSV file has been correctly selected, the CSV file is checked for validity after clicking the “Next” button.
If the CSV file is not valid, the errors found are displayed accordingly:
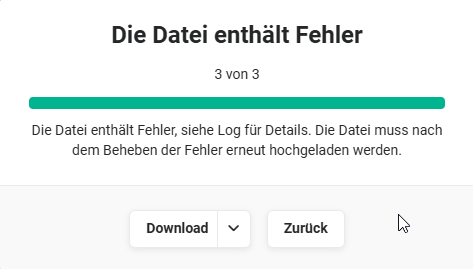 Note: file contains errors
After a successful check, a corresponding note is displayed:
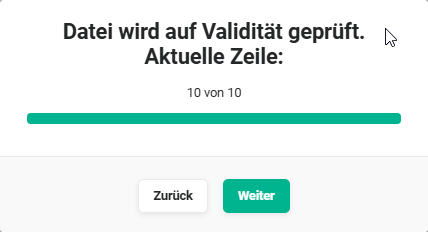 Note: validity check
Now click the “Next” button in the note pop-up to proceed to step 2.
5.1.2. Step 2 - Field mapping
In the second step “Field mapping” of the import, the records contained in the CSV file are displayed in a list view:
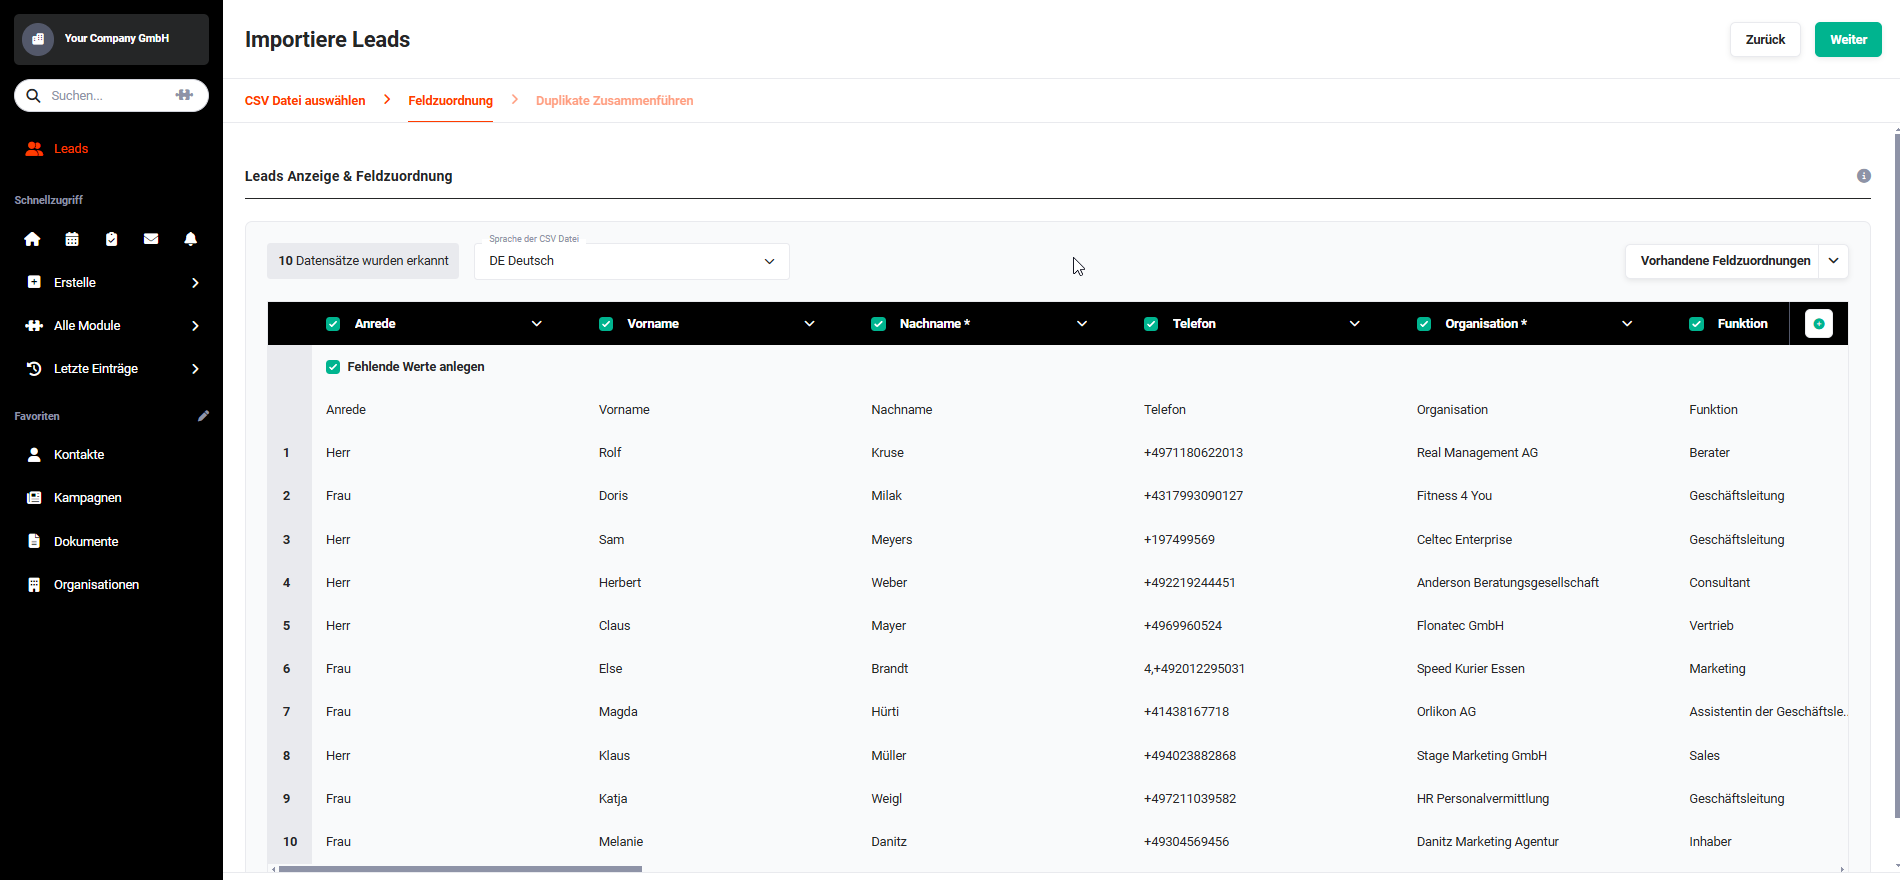 CSV import - Display & field mapping
There are various setting and selection options here:
- Display of the number of records to be imported
- Selection of the language of the CSV file
- Creating or selecting field mappings
- Selection of the columns to be imported
- Adding additional columns (fields)
- Defining automatic creation of missing picklist values
If the CSV file to be imported contains a large number of columns, these are not visible “at first glance” in the list view for reasons of space.
At the bottom of the list view there is a horizontal scroll bar, which must be used to see all columns and to configure them if necessary (deselecting/selecting fields, setting default values, setting missing field values, etc.).
5.1.2.1. Display of number of records
Directly to the left above the list view is the display of the number of detected records.
5.1.2.2. Selection of the language of the CSV file
The “Language of the CSV file” picklist is used to define the source language of the CSV file. If it is, for example, English, the value “US English” must be selected.
Based on this information, an attempt is made to identify values whose target field is a picklist and to assign them accordingly. If the value cannot be identified in the existing picklist and the corresponding option has been selected, a new value is created and assigned to the record.
General information on language is available in the following sections:
5.1.2.3. Creating or selecting field mappings
Via the “Existing field mappings” picklist, an existing field mapping can be selected or a new field mapping can be saved.
After clicking the picklist, a flyout window opens:
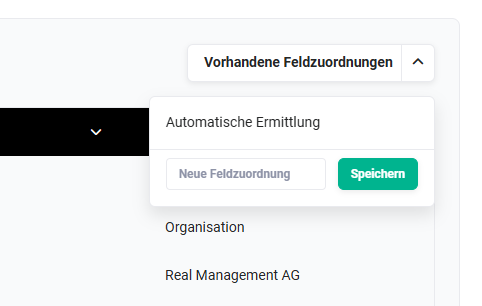 Picklist of existing field mappings
If several field mappings already exist, a field mapping can now be selected.
To save a new field mapping - which was carried out in advance - simply enter a corresponding name in the input field and click the “Save” button:
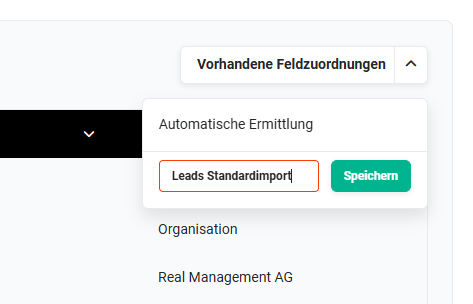 new field mapping
After the new field mapping has been saved, the flyout window appears as follows:
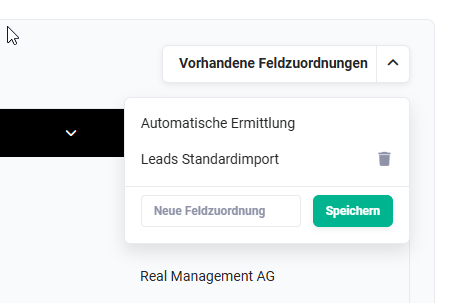 new field mapping saved
Existing field mappings can be deleted via the “Recycle Bin” action icon.
Saving field mappings is useful if CSV files with the same structure are used more frequently.
5.1.2.4. Selection of the columns to be imported
The columns to be imported are selected via the checkbox to the left of the column header.
In the following screenshot, the columns Salutation, First name, Last name and Organization have been selected. The Phone column has been deselected and is therefore not imported.
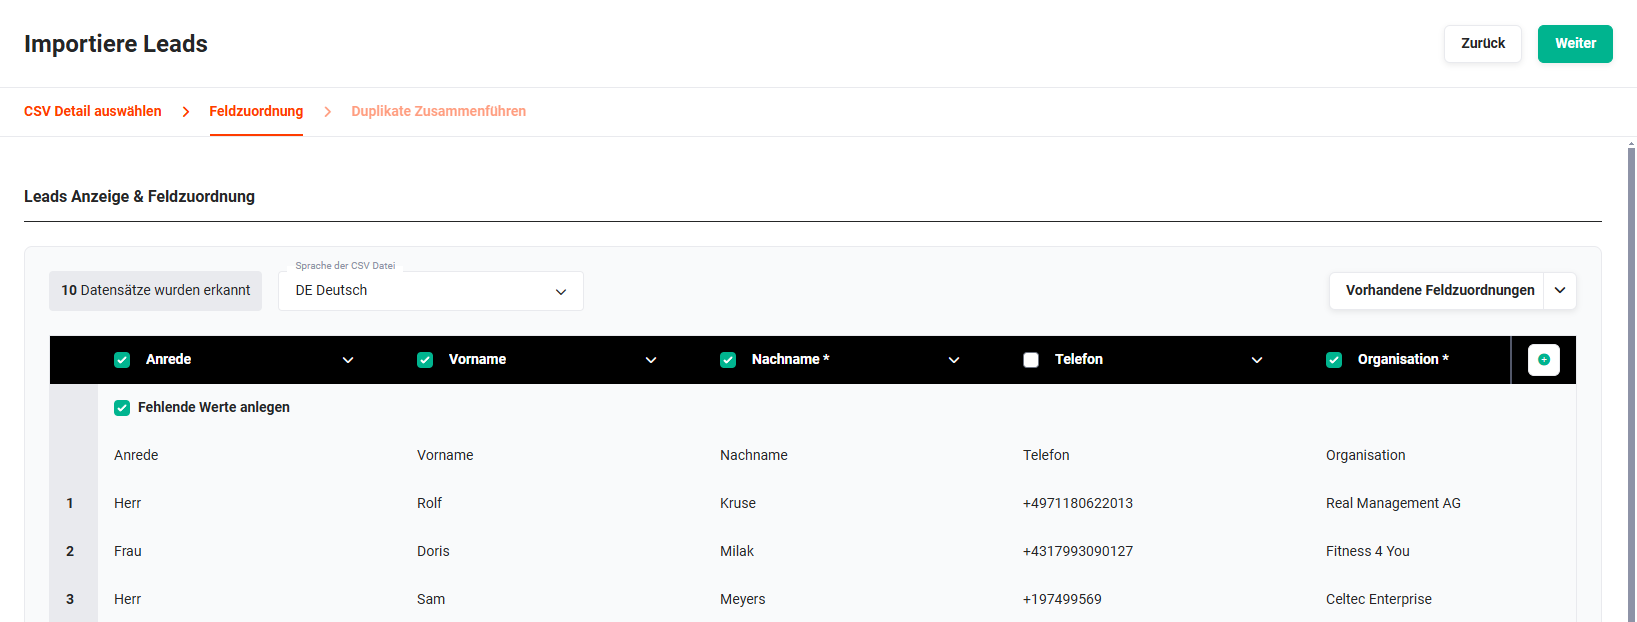 CSV import - column selection
5.1.2.5. Adding additional columns
During the CSV import, additional columns that are not contained in the CSV file can be added in order to fill them with default values.
To add additional columns, the “Add column” action icon (“Plus” icon), which is always located at the far right in the column header row, must be clicked.
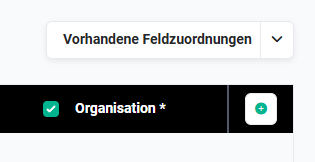 Add column action
After clicking the “Add column” action icon, the “Add column” pop-up window opens:
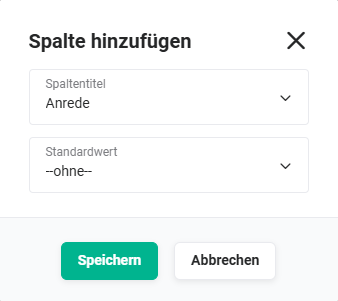 Add column pop-up
The “Column title” picklist lists all fields contained in the respective module from the detail view of a record:
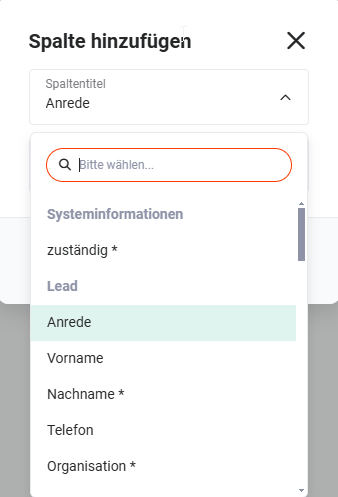 Column title picklist
A default value can now be selected in the “Default value” picklist:
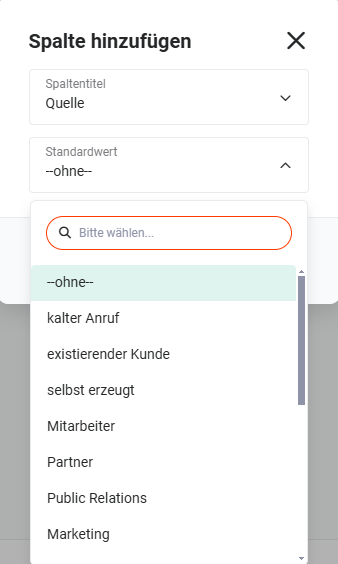 Column title picklist - Default value
The selected configuration is applied via the “Save” button in the “Add column” pop-up.
5.1.2.6. Defining automatic creation of missing picklist values
For fields of type “picklist” and “multi-selection box”, missing values can be created automatically. Whether this action is to be executed can be defined via the “Create missing values” checkbox.
The “Create missing values” checkbox is displayed in every column that is of picklist type.
For missing values in the CSV file, default values can be defined for fields of type “picklist” and “multi-selection box”.
 Set default value action icon
After clicking the “Set default value” action icon (“cog” icon), the “Set default value” pop-up window opens:
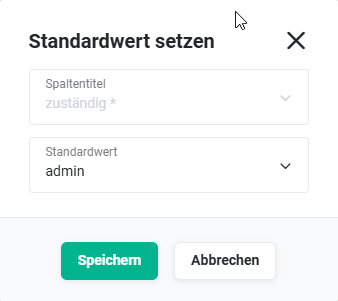 Set default value pop-up
A default value can now be selected in the “Default value” picklist.
The selected configuration is applied via the “Save” button in the “Set default value” pop-up.
5.1.2.7. Missing field mapping
If column headers are not automatically recognised as the existing fields in the respective module when reading in the CSV file, the field mapping can be carried out manually.
Missing field mappings are highlighted in colour in the list view and the column header “Missing mapping” is displayed:
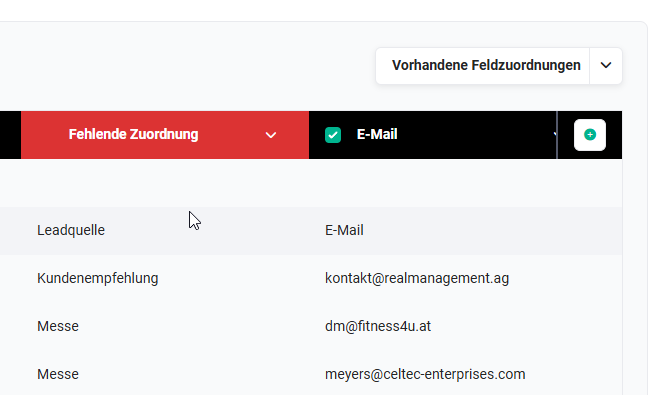 Note: missing mapping
To carry out a field mapping, click the “angle bracket” icon. A flyout window now opens, in which all fields contained in the respective module from the detail view of a record are listed:
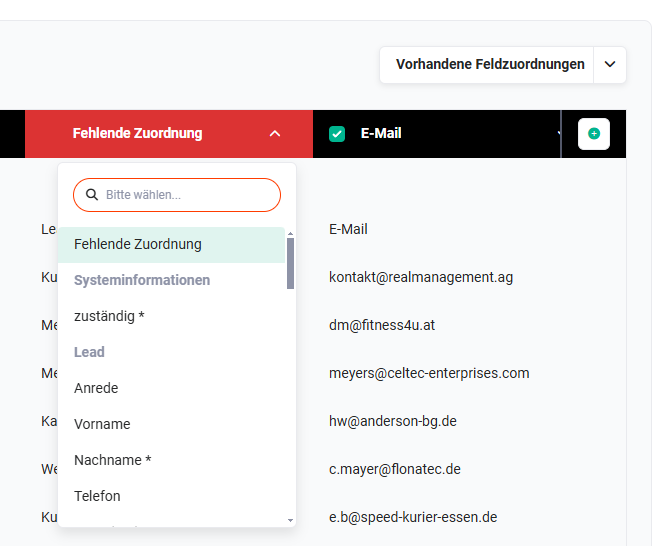 Missing mapping picklist
After clicking a field name, the selection is applied.
5.1.3. Step 3 - Merge duplicates
In the third step “Merge duplicates”, there is the option to detect duplicates during the import. In principle, there are two options here: manual merging and automatic merging.
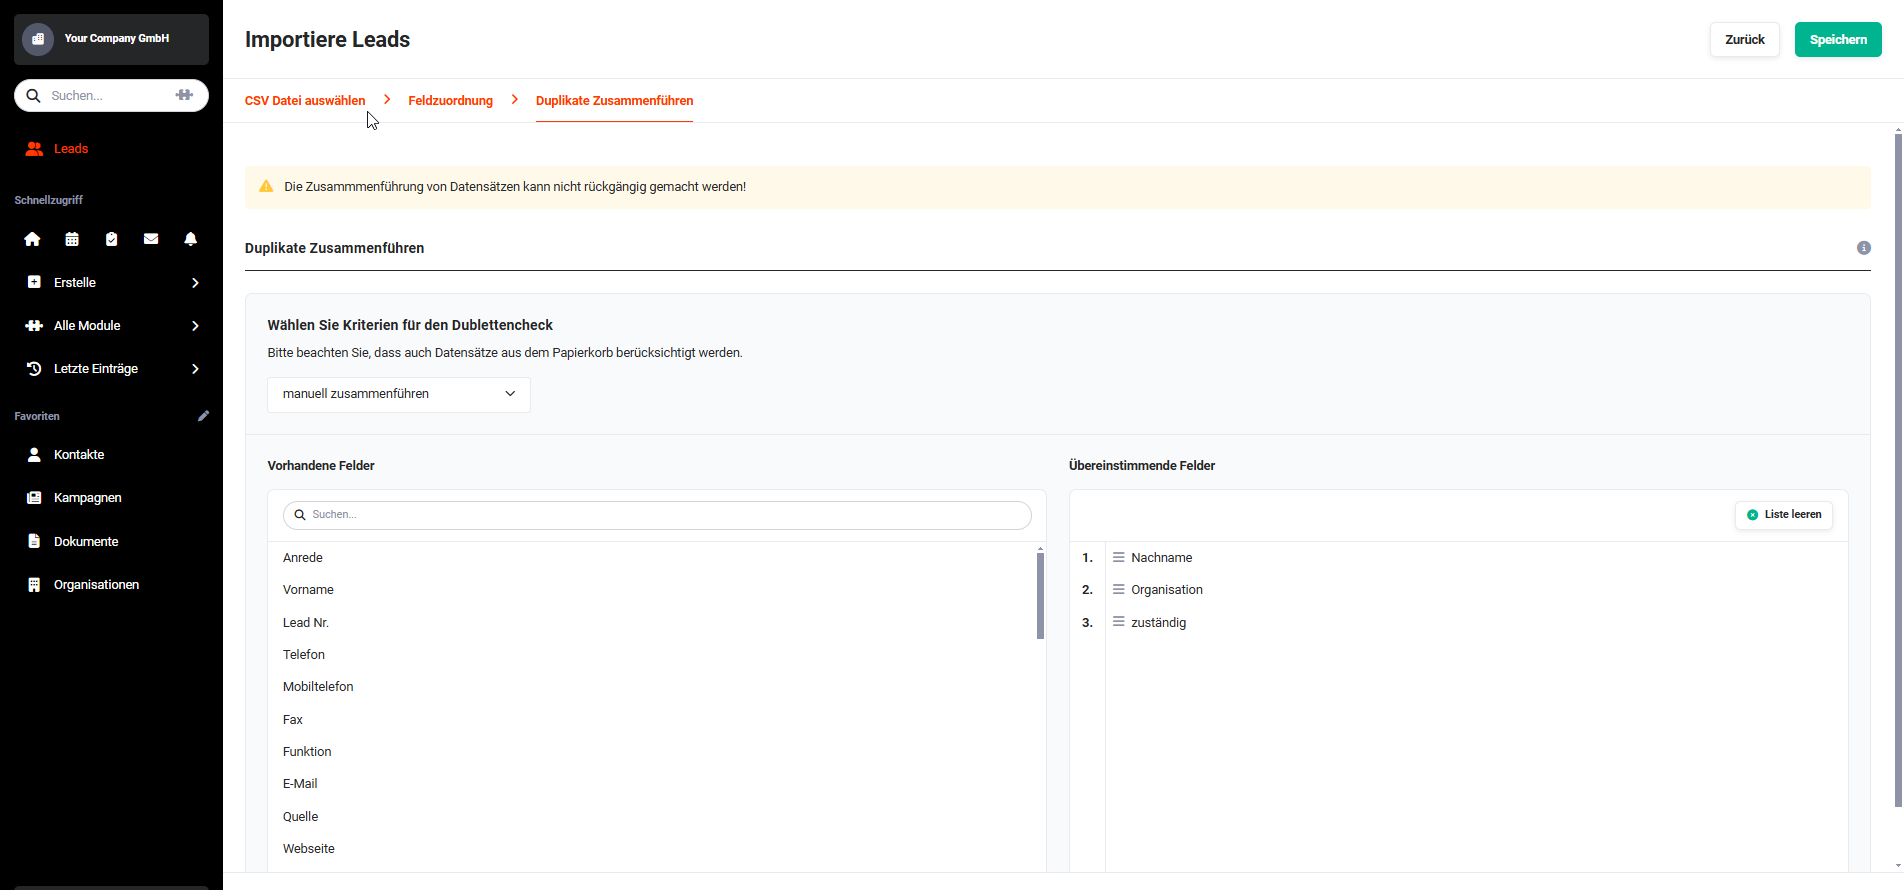 CSV import - merge duplicates
As part of the manual merging, a list of all identified duplicates is displayed after the import, with the decision on how to handle them being left to the user.
In the case of automatic merging, a selection can be made as to whether the duplicates should be ignored or overwritten during import.
In both cases, only a summary is displayed after the import, without any possibility to influence the import and the duplicates.
Via the “Select the criteria for the duplicate check” area, it can be defined on the basis of which fields the import compares the data to be imported with the existing data and thereby detects duplicates. In order to achieve the highest possible uniqueness here, it is advisable to select a combination of several fields.
For automatic merging with overwriting, the following points must be observed:
- If the option to overwrite the Leads is selected, this cannot be undone!
- If automatic merging is selected to update records, all columns in Step 2 - Field mapping must be mapped, as otherwise unmapped fields will be overwritten with empty values!
- If, on the basis of criteria that are not unique, more than one record is found as a duplicate, the first of these is overwritten and the rest are deleted from the system!
After clicking the “Save” button, the import is registered for execution. As soon as the background task CSV/ICS Import is executed the next time, the import is carried out.
The user is regularly informed about the progress of the import via notifications in the navigation bar.
5.2. Messages during CSV import
If the configuration of the CSV import has not been carried out correctly, corresponding messages are displayed.
During the CSV import, country codes are validated, among other things. The currency itself is also validated (e.g. the word “Euro” or the code “EUR”) – not to be confused with the validation of amount fields.
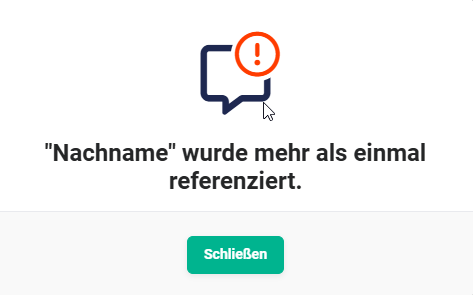
Fields have been selected more than once:
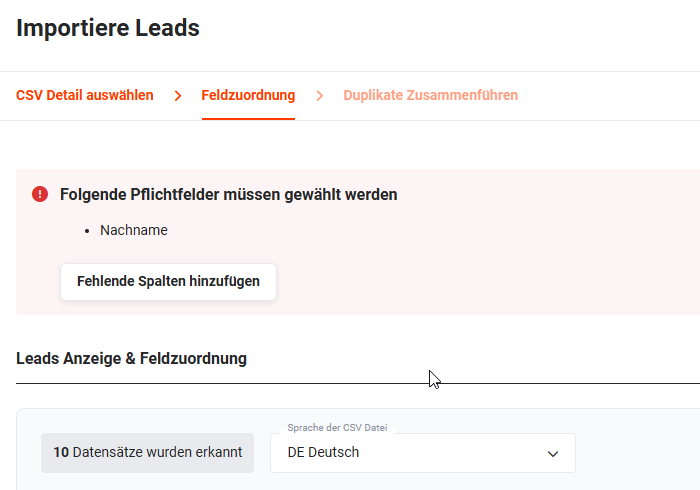
One or more mandatory fields are not present in the CSV file, or were not selected:
Only after the conflicts have been resolved can the CSV import be carried out.
5.3. Summary of the CSV import and completion
At the end of the import, a final message is displayed which may contain the following information (depending on the result of the import):
- Number of imported records
- Number of records not imported
- Number of records ignored due to duplicates
- Number of overwritten records
- Link to the list of imported records
- Link to the manual merging of duplicates
- Link to undo the import
- As soon as records have not been imported or were ignored, a link to a log file appears, in which the reasons for the corresponding rows of the CSV file are listed.
5.4. Special case CSV import of contacts
When importing records via CSV for the Contacts module, there are two additional options in the “Field mapping” step:
- Data enrichment when creating a new organization
- Data enrichment when creating a new partner
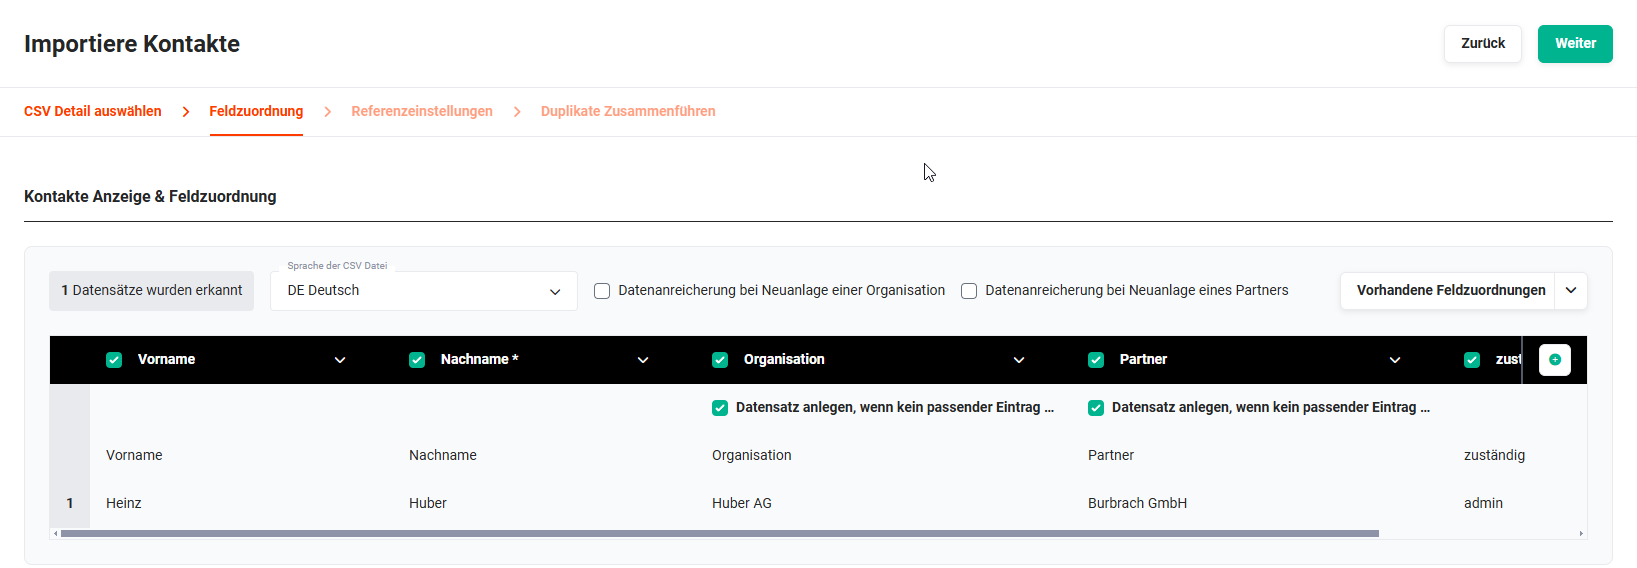 CSV import of contacts
If the checkbox is ticked here, certain data of the contact (such as email and address data) is also transferred to the organization or the partner when these are newly created. Existing records in the Organizations and Partner modules are not overwritten.
In principle, the search for already existing organizations or partners to be referenced is carried out on the basis of the organization or partner name.
After the “Field mapping” step, there is an additional step “Reference settings” in the CSV import of contacts.
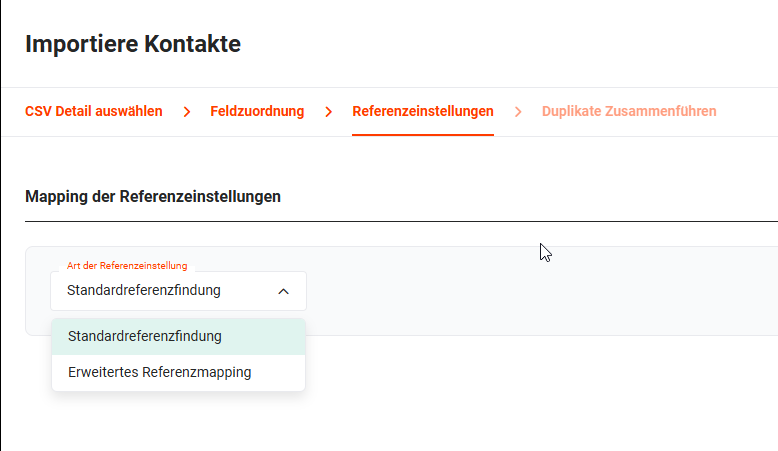 CSV import contacts - mapping of the reference settings
When mapping the reference settings, the following options can be selected for the type of referencing:
- Standard referencing → the columns “Organization” and “Partner” are used automatically (if present)
- Extended reference mapping → a field from brainX and a column from the CSV file can be selected for both organizations and partners.
5.5. Special case CSV import of users
As a rule, new or additional brainX users are created manually by the administrator in the Global settings - Users and groups area.
Alternatively, new brainX users can also be created via a CSV Import.
The procedure is described in detail in the section Global settings - Users and groups - Import users.
6. Practical examples
1 - Importing customer data into brainX when switching systems
Initial situation: A company is switching from another CRM system to brainX. The existing customer data is available as an Excel file and is to be transferred into brainX as organizations.
Procedure: The Excel file is cleaned up and the column headers are adapted to the field names in brainX. A responsible column is added and filled with the correct user name. The file is saved as CSV (comma delimited, ISO-8859-1). In the Organizations module, the CSV Import action is started. In the Merge duplicates step, automatic merging with Ignore is selected, since this is an initial import. After the background task has been executed, all records are present in brainX.
Result: All customer data is imported into brainX completely and error-free - without manual individual entry.
2 - Importing trade fair leads collectively as CSV
Initial situation: After a trade fair, the collected contact data is available in an Excel spreadsheet. All leads are to be assigned to the Trade fair lead source and allocated to a specific sales employee.
Procedure: The Excel file is saved as CSV. In the Field mapping step, the Lead source field is added with the default value Trade fair via Add column. The responsible field in the CSV is already filled with the sales employee's user name. The import is started with events deactivated, since no Automations are to be triggered.
Result: All trade fair leads are created in brainX, correctly assigned and directly available for further processing by sales.
3 - Saving field mapping for recurring imports
Initial situation: A company receives a structured file from an external service provider on a monthly basis, which is regularly imported as leads into brainX. The column names in the file differ from the brainX field names.
Procedure: During the first import, the field mapping is carried out manually in the Field mapping step and then saved under a meaningful name. For all subsequent imports, the saved field mapping is selected directly - the manual mapping is no longer needed.
Result: Recurring imports are carried out in a few clicks. Incorrect mappings due to manual entry are avoided.
7. Frequently asked questions
Why are special characters (umlauts) displayed incorrectly after the import?
The cause is usually an incorrect character encoding. If a CSV file is saved in Excel under Windows, Excel uses ISO-8859-1 (ANSI) by default. In step 1 of the import, ISO-8859-1 must therefore be selected as the character encoding. If, on the other hand, the CSV file is created in another tool or under macOS, UTF-8 is often the correct choice. In case of doubt, it is advisable to check the file in Notepad++ (Windows) or a comparable text editor.
Why are some records not created during the import?
The most common causes are missing or incorrectly spelled mandatory fields, an unrecognised user name in the responsible field (spelling must match exactly) or incorrectly formatted picklist values (single quotes missing, spelling differs). The exact causes of errors are listed in the log file, which can be accessed after the import via the corresponding link in the import summary.
What happens to empty fields in the CSV file?
Empty fields are treated as empty during the import and, with automatic merging with Overwrite enabled, overwrite the existing field value with an empty value. If empty fields are not to be overwritten, it is advisable to use the CSV update instead of the import with the overwrite option.
Can I undo the import?
Yes, immediately after the import, an Undo import link is available in the import summary. However, this is only available directly after the import. If the summary has been closed, undoing is no longer possible - the records must then be deleted manually in this case.
How many records can be imported at once?
That depends on the system-side limits. If the Allow events option is active during the import, a maximum of 100 records per import is possible by default. If events are deactivated, the general upload limit of the system applies. For very large amounts of data, it is advisable to split the import into several smaller files.
What should be observed in particular when importing contacts?
When importing contacts, there is an additional step Reference settings, in which it is defined how the contact is assigned to an organization or a partner. If a new organization is to be created automatically during the import and enriched with data from the contact, the corresponding checkbox in the Field mapping step must be enabled. Existing organizations are not overwritten in the process.